Welcome to the sixth lecture, where today you ll get an introduction to kubernetes, deploy a first application and be introduced to the most fundamental patterns
Last Updated: 2024-1-11
Why should I care about container orchestrators?
Container orchestrators simplify the process of managing, scaling, and securing containerized applications, making them essential for running large-scale applications in production.
What you'll build today
By the end of today's lecture, you should have
- ✅ an example app on a kubernetes that is provided to you
- ✅ your own manifests for your startup app
- ✅ how to use kind for a robust local setup
- ✅ how to use nix shell for avoiding local installs
Homework (Flipped Classroom)
Prepare
- A working Container Image that does what you think it should do (in Docker Compose)
- That doesn't require root privileges
PreRead
- https://learning.oreilly.com/library/view/kubernetes-patterns-2nd/9781098131678/ch01.html#:-:text=A%20Pod%20is,on%20a%20host
- https://www.youtube.com/watch?v=eJmNSYvelSw
Kubernetes Documentary: - https://youtu.be/BE77h7dmoQU?si=RGh1sjJthEuvgo4b
- https://youtu.be/318elIq37PE?si=TIYhEyJcnL3NydP1
What you'll need
- Nix shell installed ( e.g curl --proto '=https' --tlsv1.2 -sSf -L https://install.determinate.systems/nix | sh -s -- install )
- The usual (git, slack, MFA app, laptop with internet, github account etc)
Kubernetes is like a distributed linux with lots of thermostats
Control theory is a field of mathematics that deals with the behavior of dynamical systems with inputs. It's often used in engineering to manage and control complex systems.
Kubernetes itself is a system that applies control theory principles. Kubernetes uses a declarative model where the desired state of the system is defined by the user, and Kubernetes works to make the actual state of the system match the desired state. This is similar to a feedback control system in control theory.
- Desired State and Actual State: In Kubernetes, you define the desired state of your system (how many pods you want, what images they should run, etc.), and Kubernetes works to make the actual state match the desired state. This is similar to how a controller in control theory works to minimize the difference between the desired output and the actual output.
- Controllers: Kubernetes has various controllers (like ReplicaSet controller, Deployment controller, etc.) that continuously monitor the state of the system and make necessary adjustments to ensure the actual state matches the desired state. This is analogous to control theory where a controller adjusts the inputs to a system based on the difference between the desired output and the actual output.
- Feedback Loop: Kubernetes controllers operate in a loop, continuously checking the current state of the system and making adjustments as necessary. This is a form of feedback control, a fundamental concept in control theory.
- Resilience and Self-Healing: Just like control systems can adapt to changes and disturbances to maintain their desired output, Kubernetes can handle changes in the system (like a pod crashing) and work to maintain the desired state.
THEORY
Please see slides
Lets see what projects are out there and how they differ
Navigating Container Landscapes
https://landscape.cncf.io/guide#orchestration-management--scheduling-orchestration
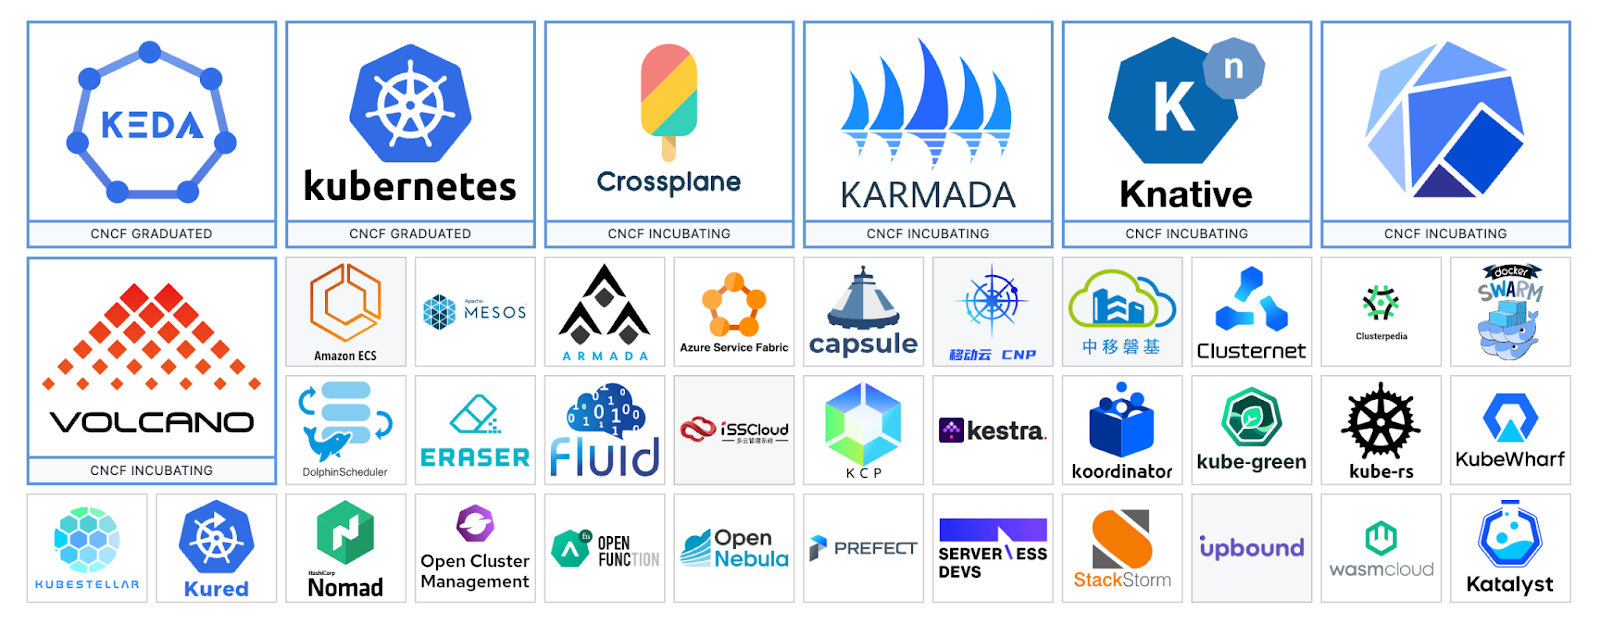
Probably the best known historical alternatives to the kubernetes idea in the past were docker-swarm and nomad (maybe also mesos). Meaning these were for a while legit considerations when one would choose a container orchestrator with standard functionality. Here it must be said, that the k8s (api) [ as implemented by many many different vendors/distros] has won the race.
K8s itself has many flavours, and we will not distinguish e.g. openshift from k8s: it is like RHEL to Linux-vanilla.
Then, there are orchestrators that extend k8s like keda. Or schedulers that try to integrate batch scheduling into cloud native like volcano.
We'll see wasmcloud in lecture 14, which will hopefully end up being a slimmed interpretation of the k8s-idea for wasm ( the future will tell).
Then there is crossplane, which lets you use k8s orchestration to orchestrate your infrastructure as code (talk about chicken egg problems :) )
Then there is Knative, which lets you build serverless on top of kubernetes.
For working offline and for the final component of your DevX setup
Kind stands for "Kubernetes in Docker". kind is a tool for running local Kubernetes clusters using Docker container "nodes". It's primarily used for testing Kubernetes itself, but may be used for local development or continuous integration.
kind is used locally because it's a lightweight way to run Kubernetes. It doesn't require a full virtual machine like some other solutions, and it's compatible with Linux, macOS, and Windows. It's also easy to integrate with CI/CD workflows.
Nix Shell
Gives you the option of running one-off shells with the packages you want to have. This is very useful if you're just trying things out. In this case, I don't want to force anyone to install kind.
# before running this, install nix shell on your OS first, otherwise install kubectl and kind
nix-shell -p kubectl kind go-task[nix-shell:~/gitrepos/]$ git clone git@github.com:AustrianDataLAB/pacman.git && cd pacman [nix-shell:~/gitrepos/pacman]$ cd kind [nix-shell:~/gitrepos/pacman/kind]$ task cluster Creating cluster "kind" ... ⢎⡠ Ensuring node image (kindest/node:v1.29.2)
Kubeconfig contexts
It's important to check which cluster you are on
[nix-shell:~/gitrepos/pacman/kind]$ kubectl cluster-info --context kind-kind
Kubernetes control plane is running at https://127.0.0.1:60659
CoreDNS is running at https://127.0.0.1:60659/api/v1/namespaces/kube-system/services/kube-dns:dns/proxy

[nix-shell:~/gitrepos/pacman/kind]$ kubectl config view
apiVersion: v1
clusters:
- cluster:
    certificate-authority-data: DATA+OMITTED
    server: https://kubernetes.docker.internal:6443
  name: docker-desktop
- cluster:
    certificate-authority-data: DATA+OMITTED
    server: https://35.189.201.181
  name: gke_adls-btpzutlnqun0uk8g7bs8i2vo8_europe-west1
...

[nix-shell:~/gitrepos/pacman/kind]$ kubectl config current-context
kind-kind
In case, your current context is NOT kind or if you d like to switch context, please do so
[nix-shell:~/gitrepos/pacman/kind]$ kubectl config set-context kind-kind
Context "kind-kind" modified.
Manifests first
Even though this is your own local setup, we'll use the same approach as we would in reality and create a namespace just for this application. Please modify the Taskfile.yml and pick your name.
[nix-shell:~/gitrepos/pacman/kind]$ task namespace
task: [namespace] kubectl create namespace constanze
namespace/constanze created
Adapt the manifests to your needs
First, run the envsubst task to replace the namespace into all manifest files.
[nix-shell:~/gitrepos/pacman/kind]$ task envsubst
task: [envsubst] export pacman=constanze
task: [envsubst] envsubst < ../kubernetes/persistentvolumeclaim/mongo-pvc.txt.yaml > mongo-pvc.yaml
task: [envsubst] envsubst < ../kubernetes/security/secret.txt.yaml > secret.yaml
Now, we'll have a closer look:
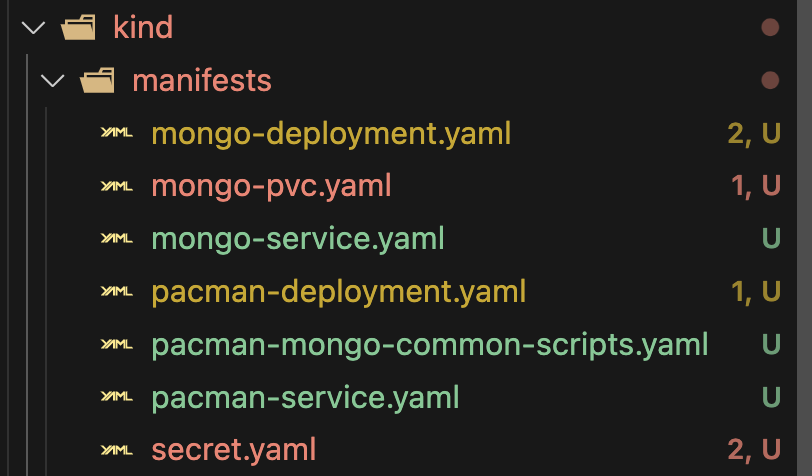
configmap
A configmap may contain any information that you want to mount into the environment of the container at run time. This can be configuration data for the application, environment variables to set, or specific files.
ConfigMap is useful because it allows these scripts to be defined once and reused in multiple places. The scripts can be mounted into a Pod using a volume, and then executed by the containers in the Pod. This can be particularly useful for defining probes, as is likely the case here.
In our case, for the mongo db , it contains
- apiVersion, kind, metadata: These fields define the type of Kubernetes resource (a ConfigMap) and its metadata, including its name (pacman-mongo-common-scripts) and labels.
- data: This section contains the actual data stored in the ConfigMap. In this case, it's three bash scripts:
- ping-mongodb.sh: This script uses the mongo command-line tool to connect to the MongoDB server on the specified port and execute the ping command. This can be used to check if the MongoDB server is running and accessible.
- readiness-probe.sh: This script uses the mongo command-line tool to connect to the MongoDB server and execute the isMaster command. It checks if the MongoDB server is a primary or secondary member of a replica set. This can be used as a readiness probe to determine if the MongoDB server is ready to handle requests.
- startup-probe.sh: This script uses the mongo command-line tool to connect to the MongoDB server and execute the hello command. It checks if the MongoDB server is a primary or secondary member of a replica set. This can be used as a startup probe to determine if the MongoDB server has started successfully.
Deployment
A Kubernetes Deployment is a higher-level concept that manages ReplicaSets and provides declarative updates to Pods along with a lot of other useful features. Deployments are used when you need to manage stateless, scalable, replicated Pods.
Here's a breakdown of the key parts of our mongo deployment:
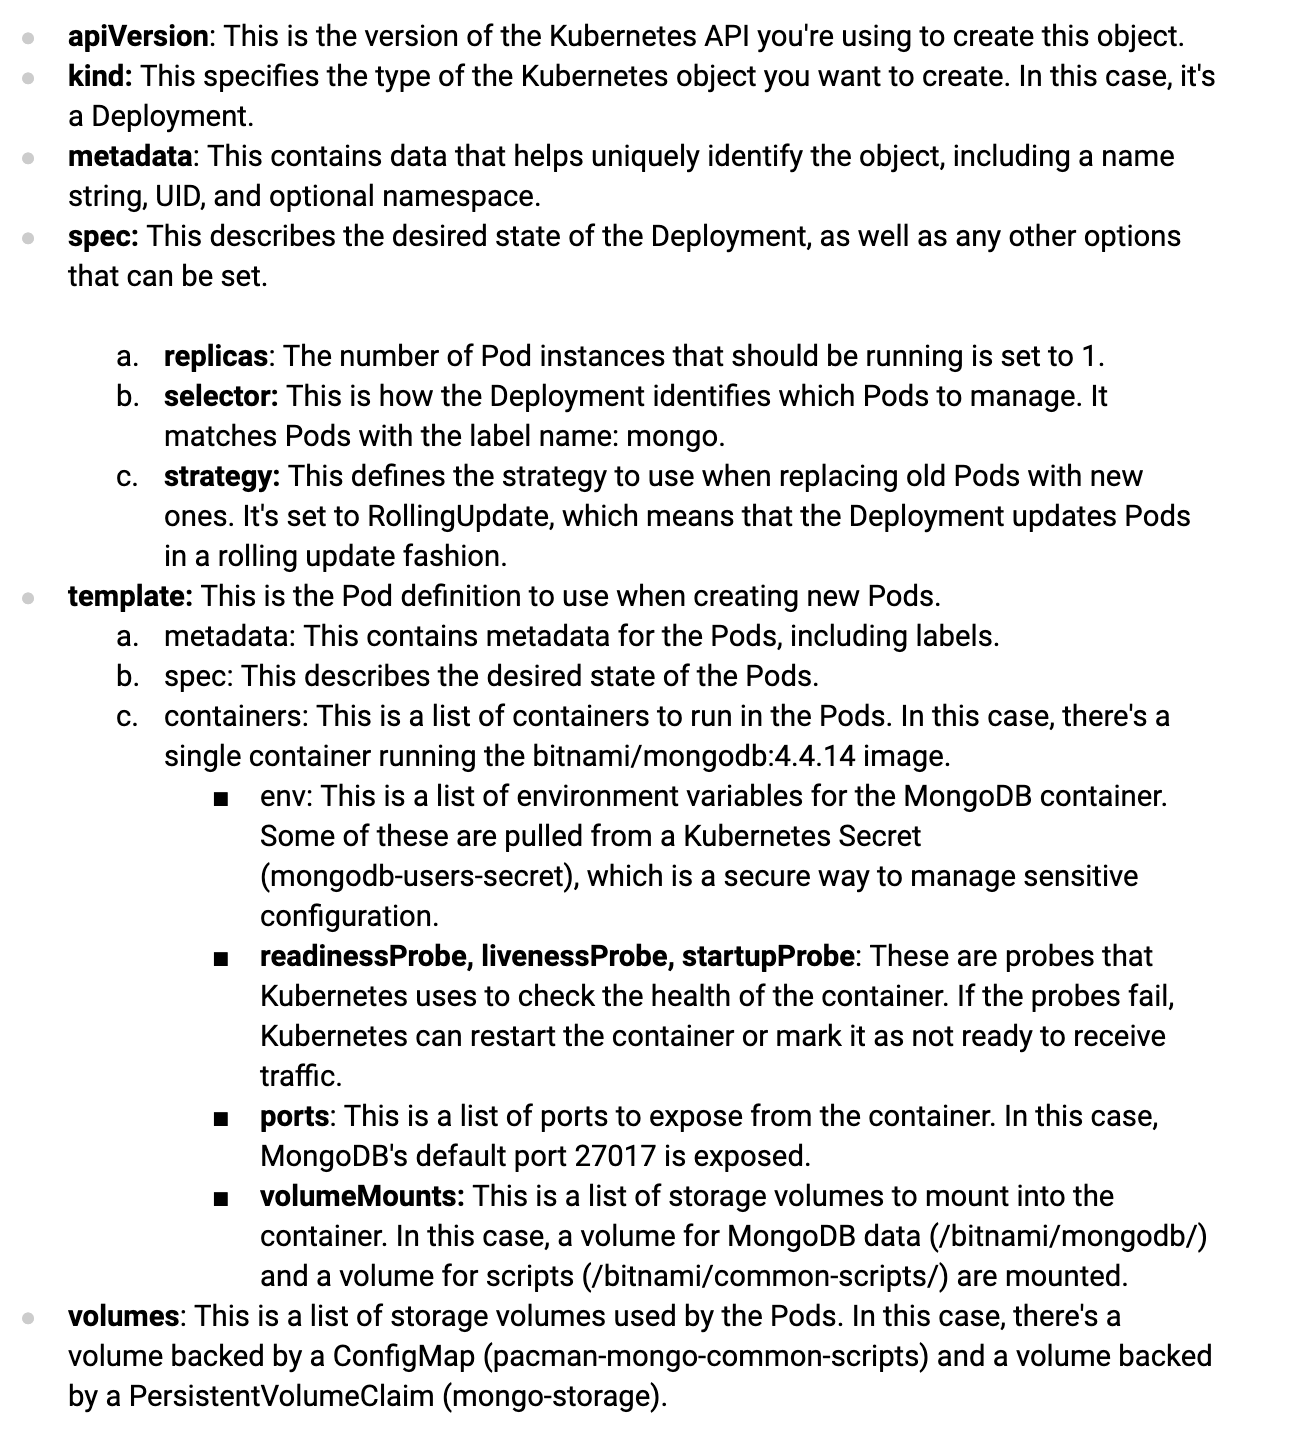
Deployments are used when you need to easily update and rollback to previous versions of your application. They're also used when you need to scale your application, and when you need to ensure your application is always running by replacing failed Pods.
PersistentVolumeClaim PVC
A PVC is a request for storage by a user. It is similar to a Pod. Pods consume node resources and PVCs consume PV resources. Pods can request specific levels of resources (CPU and Memory). Claims can request specific sizes and access modes (e.g., they can be mounted once read/write or many times read-only). While Persistent Volume Claims allow a user to consume abstract storage resources, they must be mapped to a concrete Persistent Volume to be used.
PersistentVolume PV
A PV is a piece of storage in the cluster that has been provisioned by an administrator or dynamically provisioned using Storage Classes. It is a resource in the cluster just like a node is a cluster resource. PVs are volume plugins like Volumes, but have a lifecycle independent of any individual Pod that uses the PV. This object describes the storage capacity and access modes, and often provides a StorageClass reference which describes how the volume should be provisioned and the reclaim policy.
In summary, a Persistent Volume is a piece of storage in the cluster that has been provisioned by an administrator, while a Persistent Volume Claim is a request for storage by a user. The PVC will bind to a suitable PV and allow a Pod to use it as storage.
Secret
A Kubernetes Secret is an object that lets you store and manage sensitive information, such as passwords, OAuth tokens, and ssh keys. Storing confidential information in a secret makes it RBAC protectable and more flexible than putting it verbatim in a Pod definition or in a container image.
In the provided YAML file, a Secret named mongodb-users-secret is being created. This Secret contains several key-value pairs in its data field:
- database-admin-name
- database-admin-password
- database-name
- database-password
- database-user
Each key-value pair in the data field represents a secret, where the key is the secret name and the value is the base64 encoded secret data.
Please remember that base64 is not a form of encryption, and secrets are essentially plaintext. They are an important pattern, for RBAC and to be externalizable.
Service
A Kubernetes Service is an abstraction which defines a logical set of Pods and a policy by which to access them, sometimes called a micro-service. The set of Pods targeted by a Service is usually determined by a selector.
In our case, the Service named pacman is routing traffic from its own port 80 to port 8080 on any Pods that have the label name: pacman. This allows other components in the cluster to communicate with the pacman Pods by sending requests to the pacman Service, without needing to know the details of the individual Pods.
[nix-shell:~/gitrepos/pacman/kind]$ task deploy-manifests
task: [deploy-manifests] for i in manifests/*; do kubectl apply -f $i; done
deployment.apps/mongo created
persistentvolumeclaim/mongo-storage created
service/mongo created
deployment.apps/pacman created
configmap/pacman-mongo-common-scripts created
service/pacman created
secret/mongodb-users-secret created
Now, let's play pacman
[nix-shell:~/gitrepos/pacman/kind]$ kubectl port-forward service/pacman 8000:80
Forwarding from 127.0.0.1:8000 -> 8080
Forwarding from [::1]:8000 -> 8080
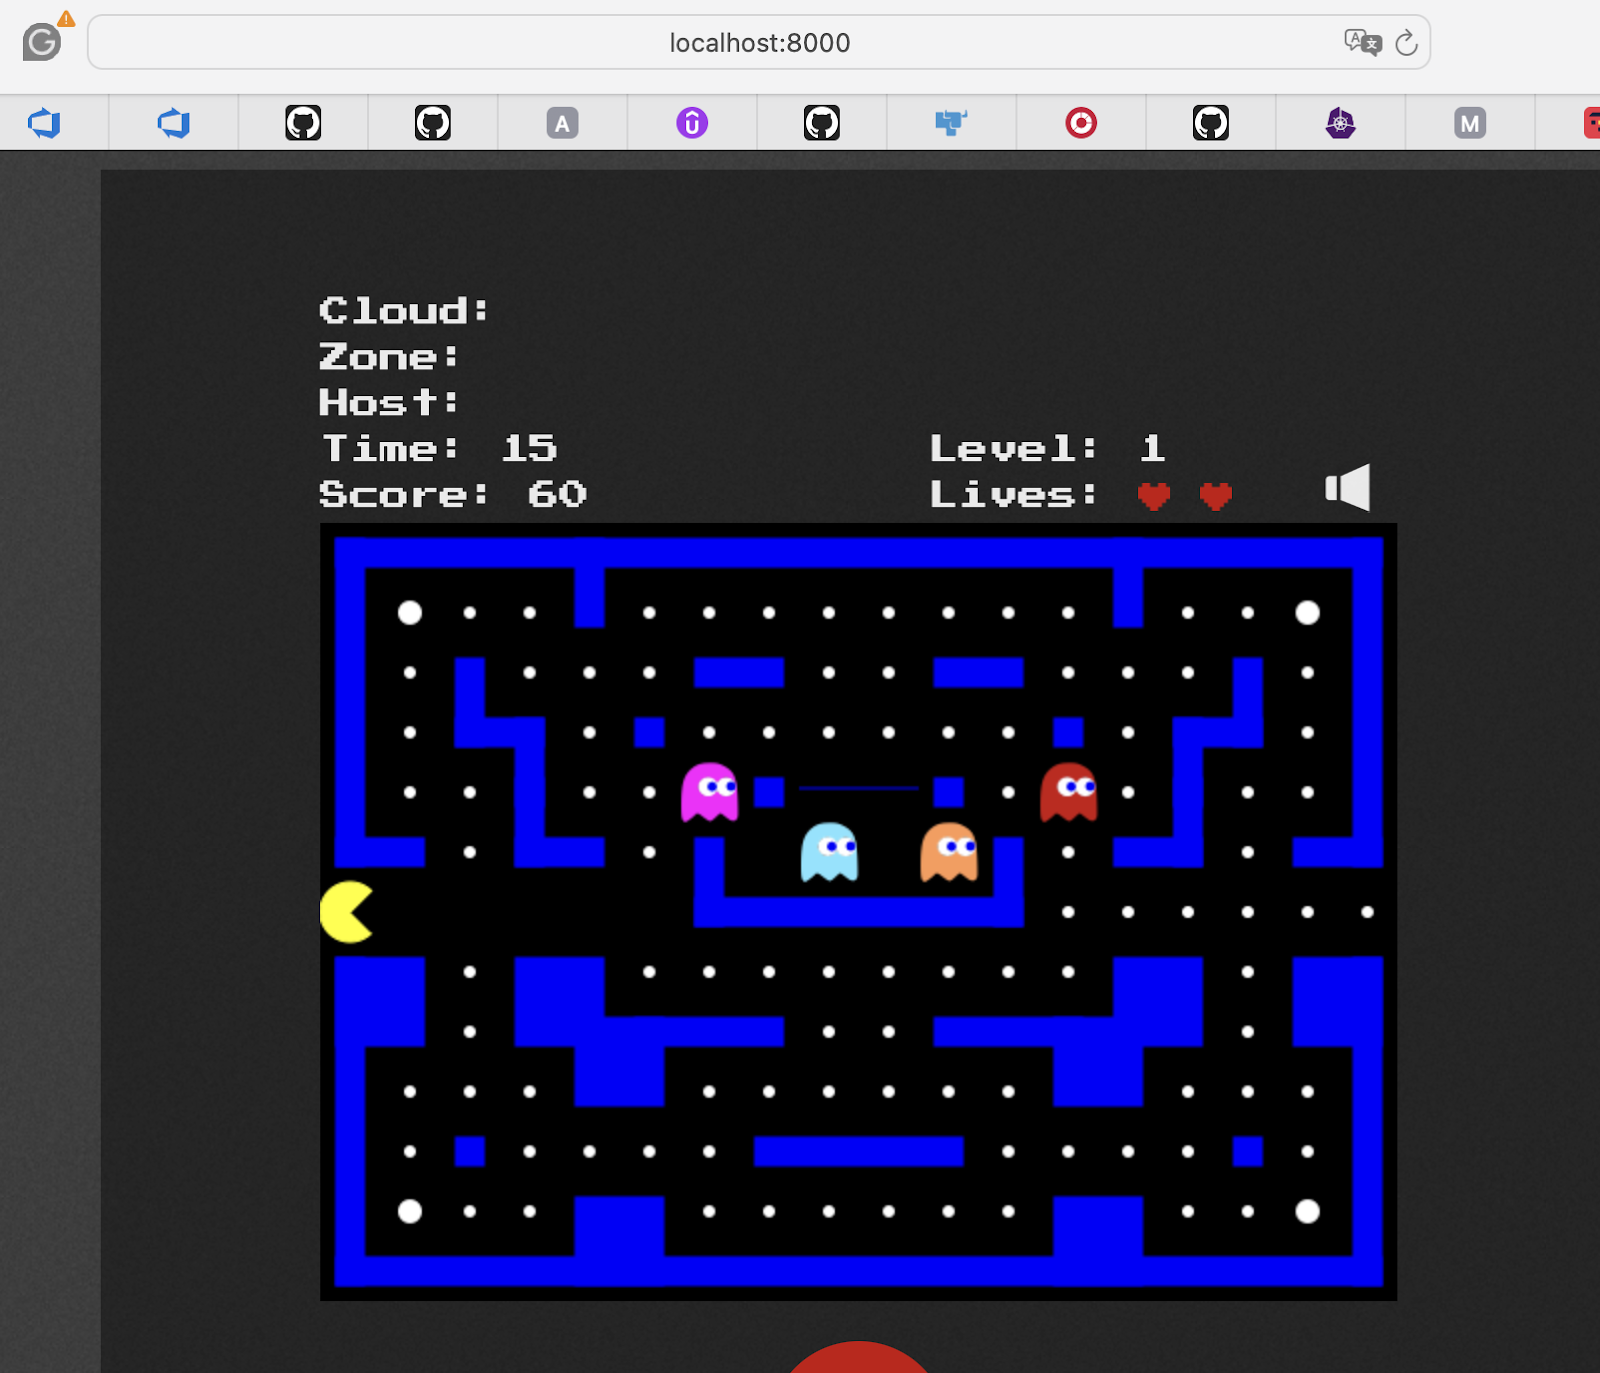
UI local
You have several choices here, for example LENS or k9s.
This is a screenshot of lens (in the free version)

Our manifests only contain basic primitives, lets do an exercise each
You can also compare with the official upstream examples found at:
https://github.com/k8spatterns/examples
Your task now, is to modify the manifests, go into the items, list them, find them, see what happens.
(we ignore the ingress for now and only work with port-forward).
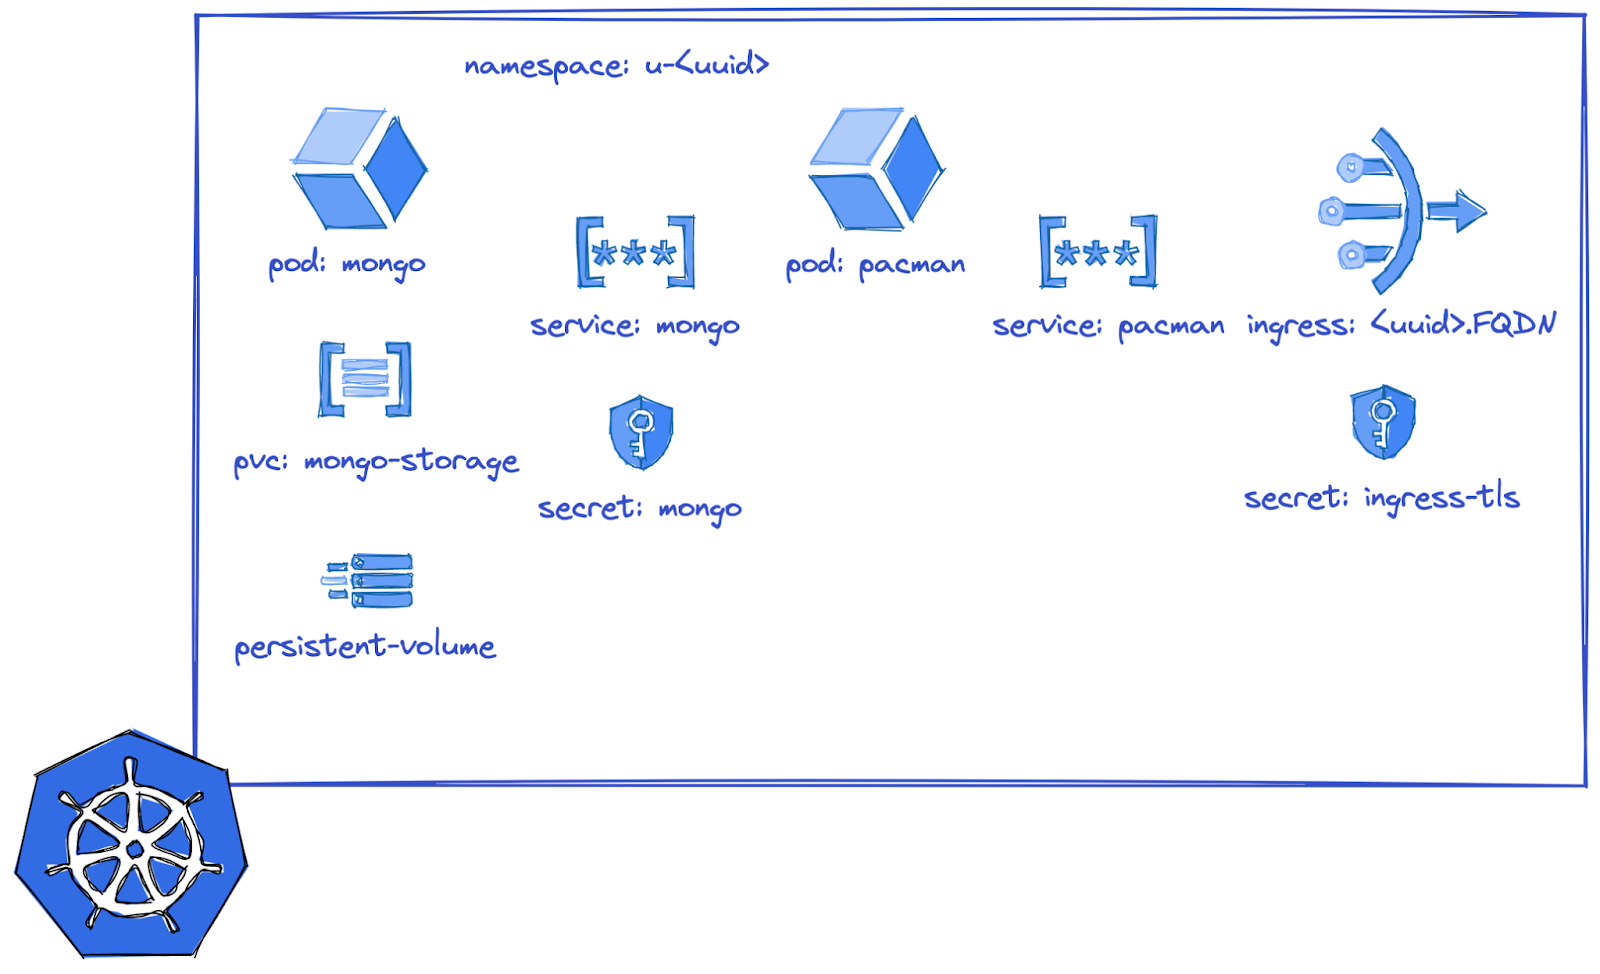
Pods
Shell into your pod and look around
Secret
Read your secret
Replace its value
PVC
Try to make it bigger: from 1 Gb to 2Gb
Each team gets two RKE2
RKE2 is a flavour or distro that implements the kubernetes API. Nowadays part of SUSE.
We ll mostly run it with Rancher on top, which is a hyperconverged solution to manage fleets of clusters, do CI/CD etc etc. All we will be using is the SSO feature and the Application Catalogue.
It s important to note, that the kubernetes API (like the linux kernel for different distros) depends only on the version of the engine (in this case rke2-1-28 -> giving you the 1.28 version of the API) , so whatever you ll see in the UI is a superset of what ANY kubernetes of that version offers you.
The reason we start with such a fat installation is that it is much more accessible and explorable. You can use CLI in the browser inlay or locally on your laptop.
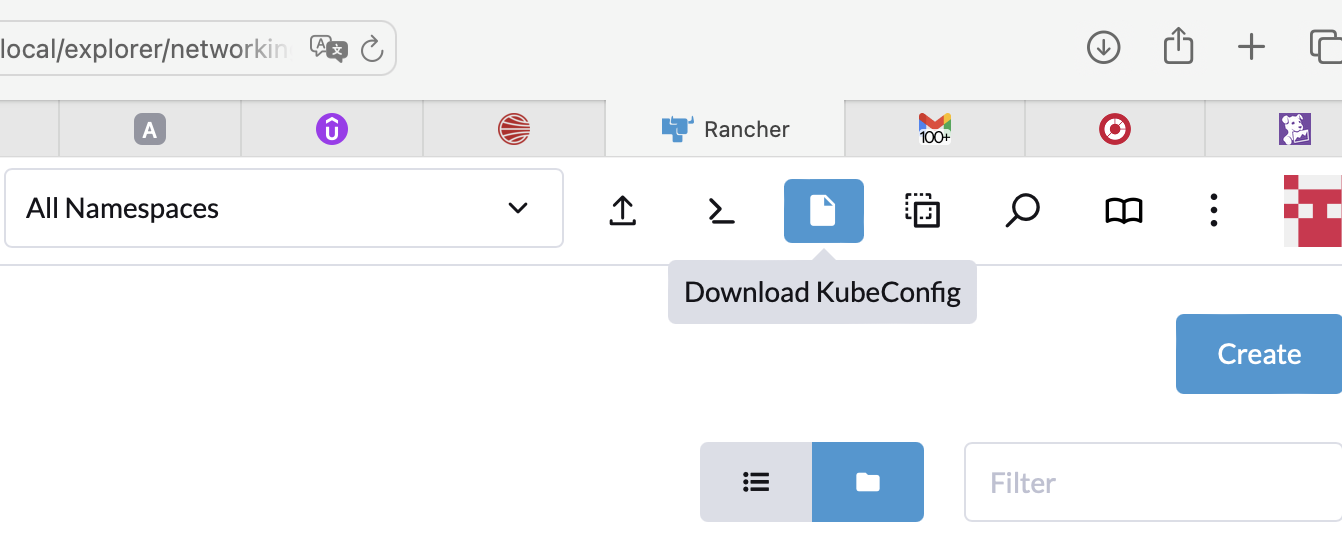
First things first: download from the URL you were given, the kubeconfig file and export its location
# install kubectl or use nix-shell
export KUBECONFIG=yourpath
kubectl version
This is a shared cluster so don't deploy anything just yet.
❯ kubectl config get-contexts
CURRENT   NAME    CLUSTER   AUTHINFO   NAMESPACE
*         local   local     local
❯ kubectl get nodes
NAME             STATUS   ROLES                       AGE     VERSION
k8s-agent-001    Ready    <none>                      4d18h   v1.28.8+rke2r1
k8s-agent-002    Ready    <none>                      4d18h   v1.28.8+rke2r1
k8s-mgmt         Ready    control-plane,etcd,master   4d18h   v1.28.8+rke2r1
k8s-server-001   Ready    control-plane,etcd,master   4d18h   v1.28.8+rke2r1
k8s-server-002   Ready    control-plane,etcd,master   4d18h   v1.28.8+rke2r1
Namespace: this time for real
On kind the namespace wasnt really so important, now it is. Make sure it is being set correctly in all the manifest when running the taskfile
Repeat on the real cluster what you did on kind
Exercises:
- Switch contexts and know where you are
- Navigate the RancherUI
- How many controlplane nodes does this cluster have?
- Use the embedded shell to do some kubectl commands, notice the timeout so you wont be surprised in the future
- Find the etcd installation (I d not recommend to mess with it)
Hubble UI
Login
Your instructor will give you the credentials
Exercises:
- Find your port forwarding traffic
- Find some DNS traffic
- Do you find any blocked traffic , if not -> can you create blocked traffic -> give it a try
Nothing to see here
An ephemeral container is a new container located in the same pod as the target container. Since they are in the same pod, they share resources, which is ideal for tricky situations such as debugging an instantly falling container. [Taken from adaltas.com .]
❯ task ephemeral-debug
task: [ephemeral-debug] export POD_NAME=$(kubectl get pods -n constanze -l name=mongo -o jsonpath="{.items[0].metadata.name}")
kubectl debug -n constanze -it $POD_NAME --image=busybox

Defaulting debug container name to debugger-wtv6h.
If you don't see a command prompt, try pressing enter.
/ #
/ #
/ # env
KUBERNETES_SERVICE_PORT=443
KUBERNETES_PORT=tcp://10.43.0.1:443
MONGO_SERVICE_HOST=10.43.194.81
HOSTNAME=mongo-7445cdf97c-frzvl
Exercises:
- Connect to the mongo database
- Read the highscore (you might have to play pacman first)
- Modify the highscore
Hint: modify the Taskfile (there could be a solution in there)
Deploy your entire startup app on kind, using manifests
Various VSCode plugins can help to generate these manifests , but make sure you know what the fields mean and be intentional about the settings.
By the beginning of next class, your team should be able to deploy the most fundamental components of your app to k8s , manually.
Explicit decisions that are required:
- What kind of deployment will it be: deployment, deamonset, replicaset?
- How many services will you need?
- Should you create separate namespaces?
- What will you externalize into secrets?
- What will you configure via environment variables?
- Will you be needing state of any form, what kind of state?
- What labels do you need (to group stuff)?
NOTE: please dont create ingresses to public unless your endpoints are AUTHN protected or are at least using the OAUTH-proxy.
Congratulations, you've successfully completed the introduction to kubernetes. You should now have a local setup of kind up and running, know how to access your team's RKE2 .
You have deployed manifests for basic kubernetes primitives and debugged a pod using ephemeral containers.
What's next?
- We ll deploy an AKS (or GKE) in each team next week and talk a bit about non-functional problems and why or why not one would chose a self-hosted versus a fully managed kubernetes solution.
- Next week, we ll meet a couple more patterns and continue to deploy your startup application
- We will also package it into a helm chart