Welcome to the second lecture, where today we will study in depth what a container really is.
Last Updated: 2024-1-11
Why should I care about containers?
Containers are a very overloaded term and many people use them in their daily lives without ever really going down into the origins and low-level principles of what they really are. Containers, after all, are ubiquitous in cloud native environments and even if you dont build your own, you are probably using them yourself, more often than not.
They aren't black magic, however, and having a fundamental understanding of their nature will avoid many misconceptions and accidental misusages.
What you'll build today
By the end of today's lecture, you should have
- ✅ a very simple way to run a "tarball"
- ✅ a simple way to constrain it using linux namespaces
- ✅ a simple way to constrain it further using linux cgroups
What you'll need
- Your Azure VM
- The usual (git, slack, MFA app, laptop with internet, github account etc)
Desired Learning Outcome
- Understand how containers work
Homework (Flipped Classroom)
Prepare
- Last week's homework= an Azure VM with a hardened (network) setup and running a linux os that your team is very comfortable with, should only support identity enabled ssh.
PreRead
In the beginning, there was a little program called run.sh
(Parts of the following is taken from https://www.infoq.com/articles/build-a-container-golang/ , all credit goes to the original authors)
In the beginning, there was a program. Let's call the program run.sh, and what we'd do is we'd copy it to a remote server, and we would run it. However, running arbitrary code on remote computers is insecure and hard to manage and scale. So we invented virtual private servers and user permissions. And things were good.
But little run.sh had dependencies. It needed certain libraries to exist on the host. And it never worked quite the same remotely and locally. So we invented AMIs (Amazon Machine Images) and VMDKs (VMware images) and Vagrantfiles and so on, and things were good.
Well, they were kind-of good. The bundles were big and it was hard to ship them around effectively because they weren't very standardised. And so, we invented caching.
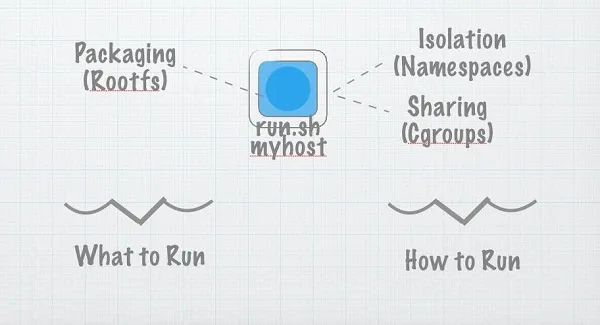
(credit: https://www.infoq.com/articles/build-a-container-golang/)
Caching is what makes Container images so much more effective than vmdks or vagrantfiles. It lets us ship the deltas over some common base images rather than moving whole images around. It means we can afford to ship the entire environment from one place to another. It's why when you `docker run whatever` it starts close to immediately even though whatever described the entirety of an operating system image.
And, really, that's what containers are about. They're about bundling up dependencies so we can ship code around in a repeatable way.
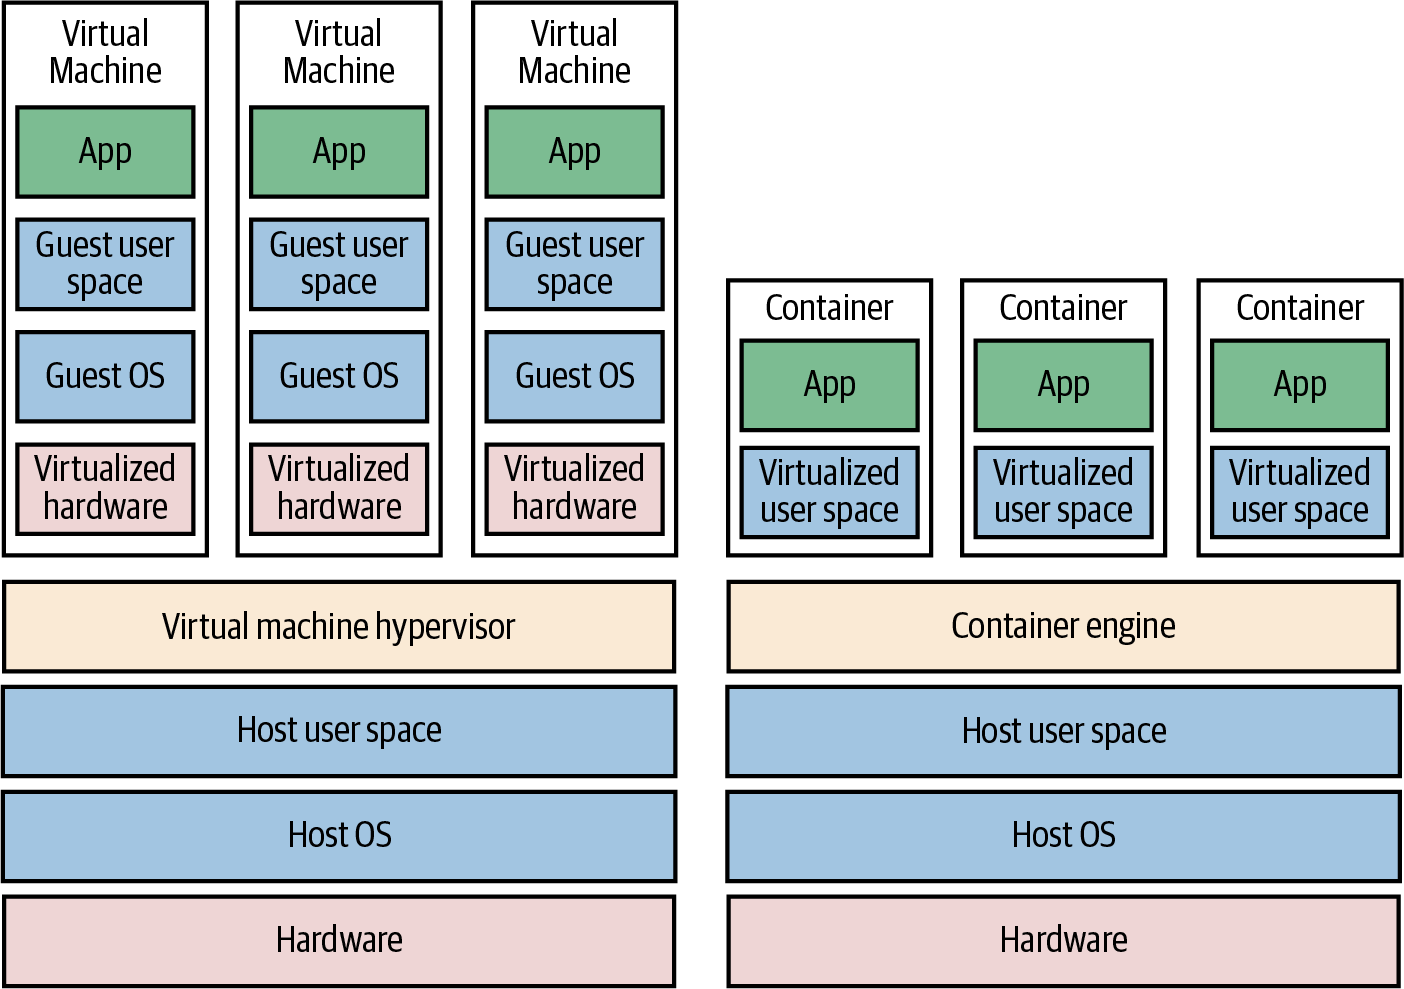
(From Terraform Up and Running, 3rd edition, chapter 1)
So all was good.
Until, we found security issues, and there was the whole "Security Supply Chain Problem" (more about this later) so suddenly it wasnt cool anymore to package the entire universe into a container, since anything that is shipped is potentially vulnerable. And nobody has time to analyse if a layer in someone else's container is actually used/needed or the reason for its existence. So, people invented the tiniest of base images (first alpine, then distroless, later wolfi) to decrease the attack surface and a good (!) container nowadays only ships run.sh and the absolute minimum of what it needs.

https://github.com/opencontainers/runc/blob/main/libcontainer/README.md
So all is good.
(well, yes, that's where we stand in 2024, but as we'll learn today, containers are for packaging and were never designed for security. So: they contain all dependencies, but they are not contained securely. In later lectures, we will see what that meant for the kubernetes ecosystem and why there is the latest hype on alternatives such as WebAssembly)
Alternative VM (use your own if at all possible)
Start a coder VM "GCP VM", you need a fresh token from your instructor for this.
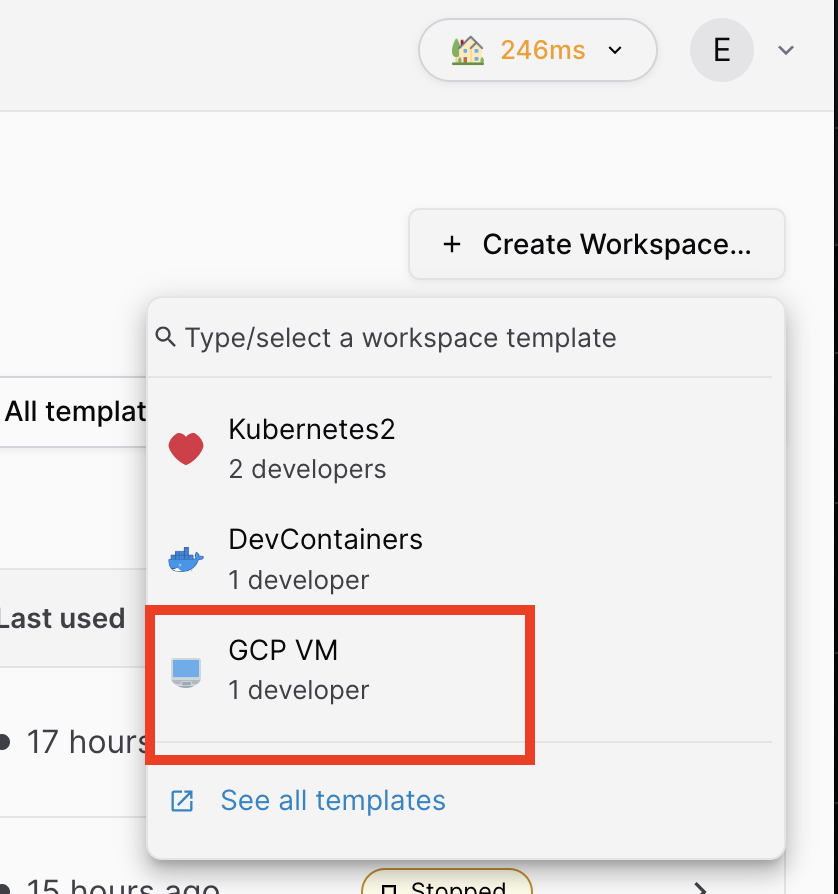
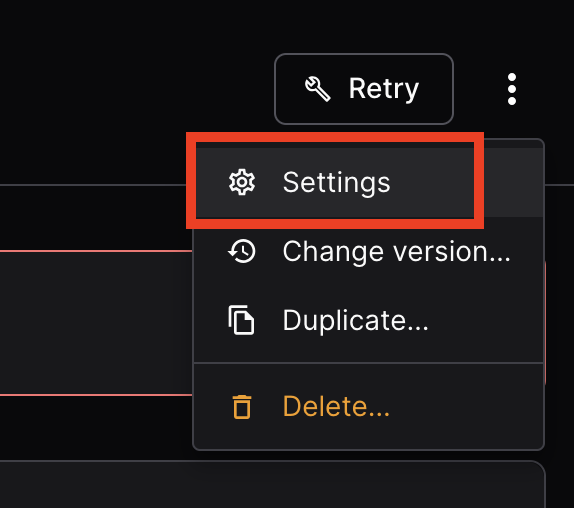
If you get the following error, ask your instructor to give you a fresh token, enter it in "Settings". And then "Retry"
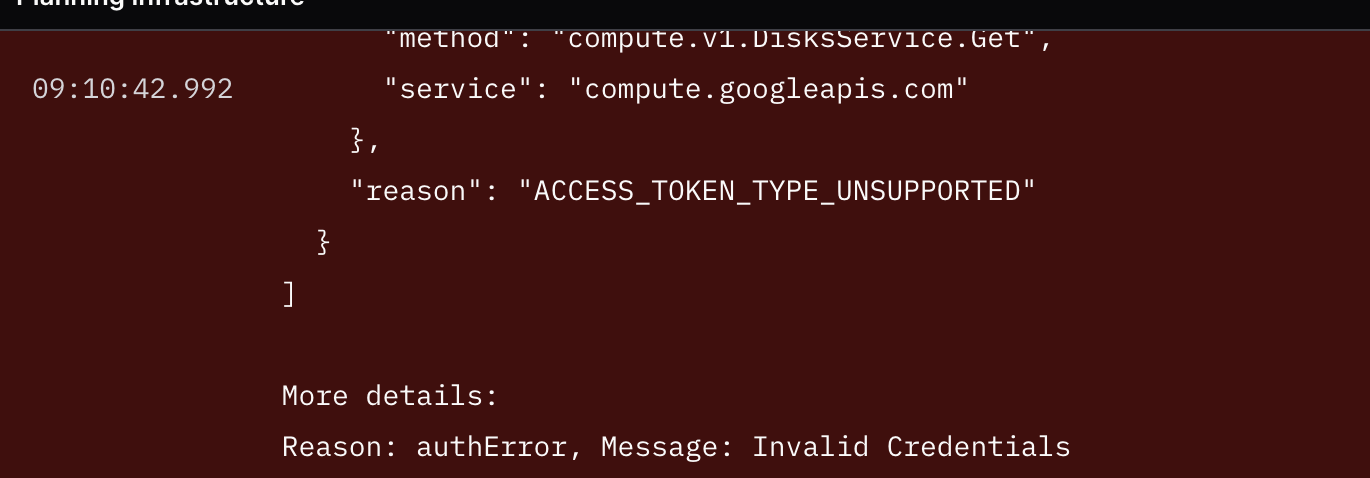

Install git docker and go on your VM
(This is assuming ubuntu, change accord to your own distro)
Install git and docker
sudo apt install git -y
# Add Docker's official GPG key:
sudo apt-get update
sudo apt-get install ca-certificates curl gnupg
sudo install -m 0755 -d /etc/apt/keyrings
curl -fsSL https://download.docker.com/linux/debian/gpg | sudo gpg --dearmor -o /etc/apt/keyrings/docker.gpg
sudo chmod a+r /etc/apt/keyrings/docker.gpg

# Add the repository to Apt sources:
echo \
  "deb [arch=$(dpkg --print-architecture) signed-by=/etc/apt/keyrings/docker.gpg] https://download.docker.com/linux/debian \
  $(. /etc/os-release && echo "$VERSION_CODENAME") stable" | \
  sudo tee /etc/apt/sources.list.d/docker.list > /dev/null
sudo apt-get update
sudo apt-get install docker-ce docker-ce-cli containerd.io docker-buildx-plugin docker-compose-plugin
Install go
sudo bash -c 'add-apt-repository ppa:ubuntu-lxc/lxd-stable; sudo apt-get -qq update;sudo apt-get install -y golang'
coder@coder-schaschaisthebestadmin-vm3-root:~$ go version
go version go1.19.8 linux/amd64
Depending on your choice, open "code-server" or a shell and clone the repo
git clone https://github.com/AustrianDataLAB/gocontainerrt.git
(You can let VScode install GO SDK for you if you like)
$ cd gocontainerrt/
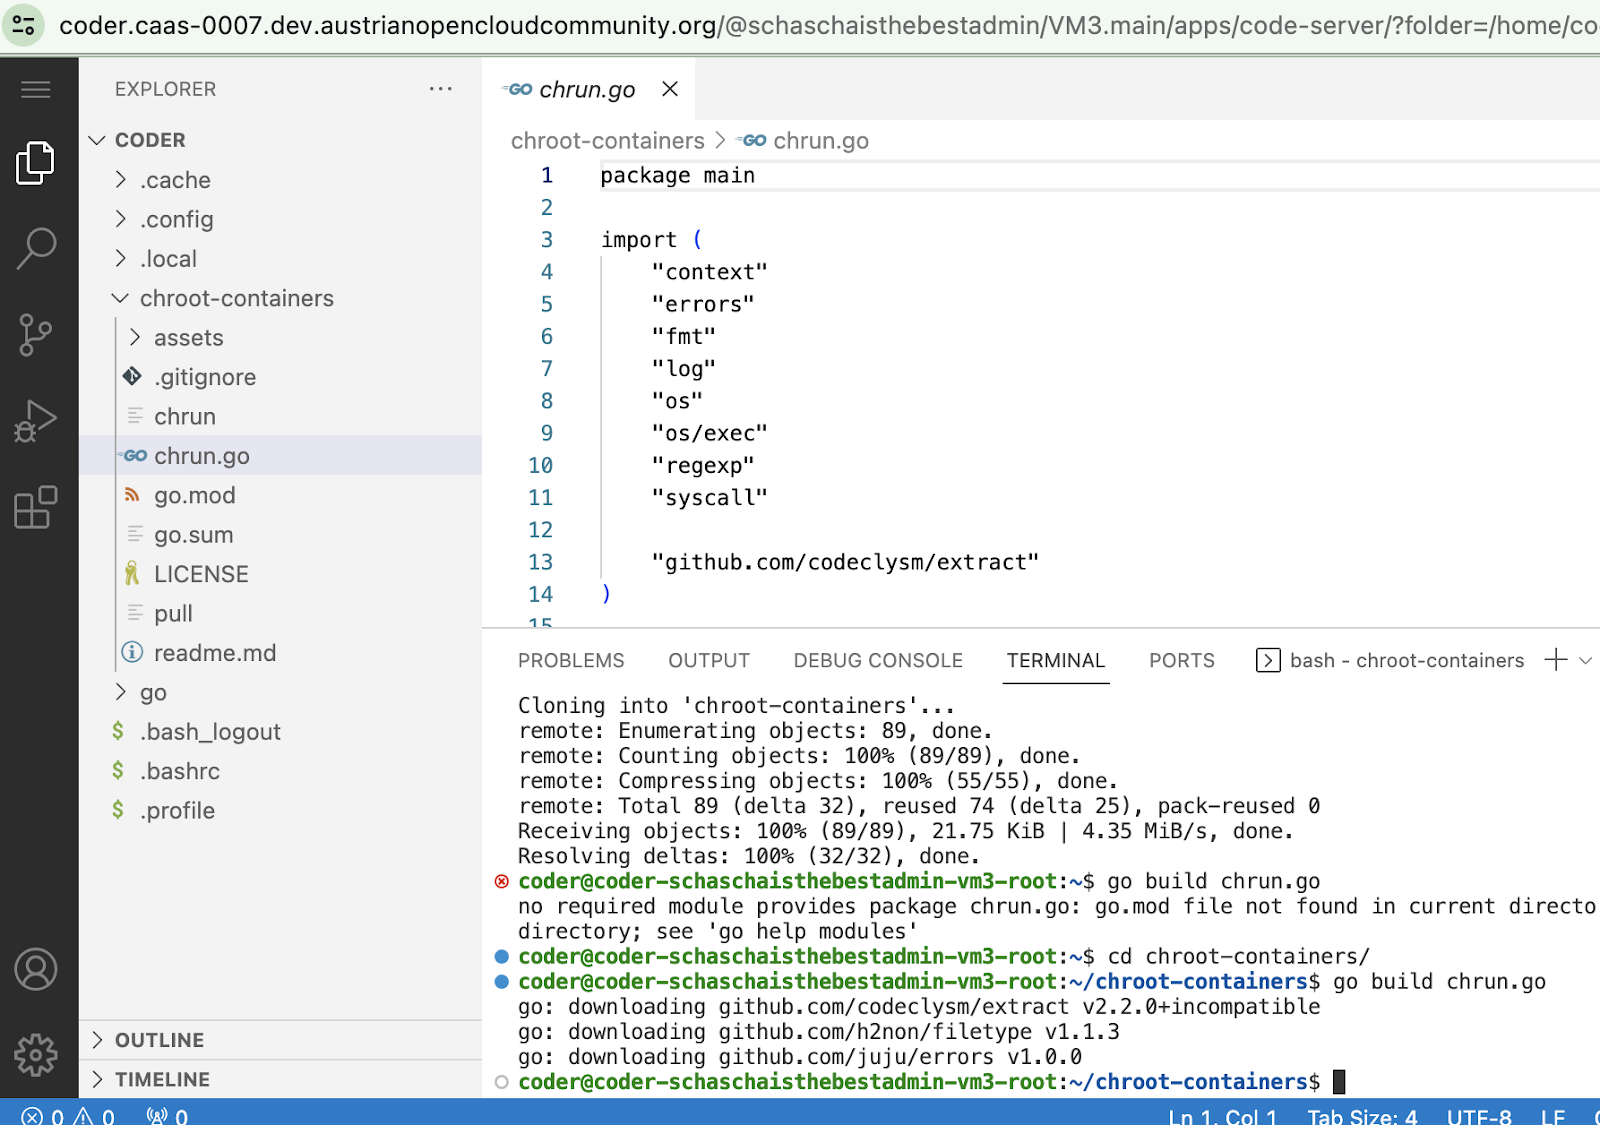
$ go build chrun.go
$ mkdir -p assets
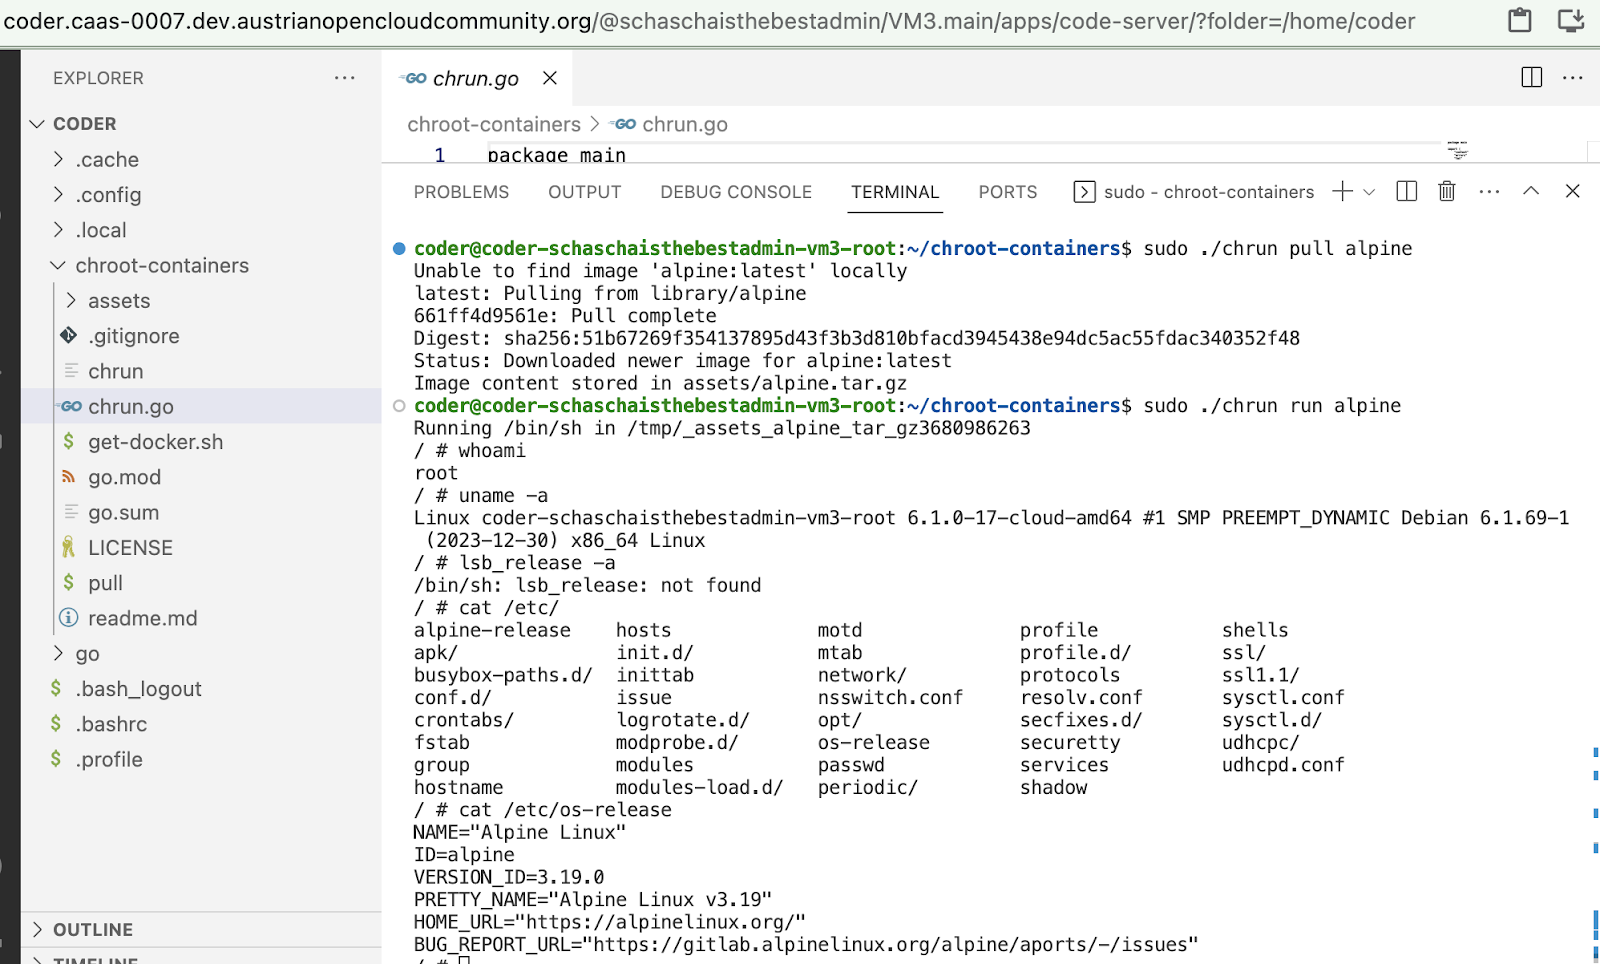
$ sudo ./chrun pull alpine
Image content stored in assets/alpine.tar.gz
$ sudo ./chrun run alpine
What we can observe so far
Check how many namespaces there are when you run the "container" vs when not.
Is this "container" mounting anything?
What do you notice?
So, this "container" really only creates a chroot from a tar ball.
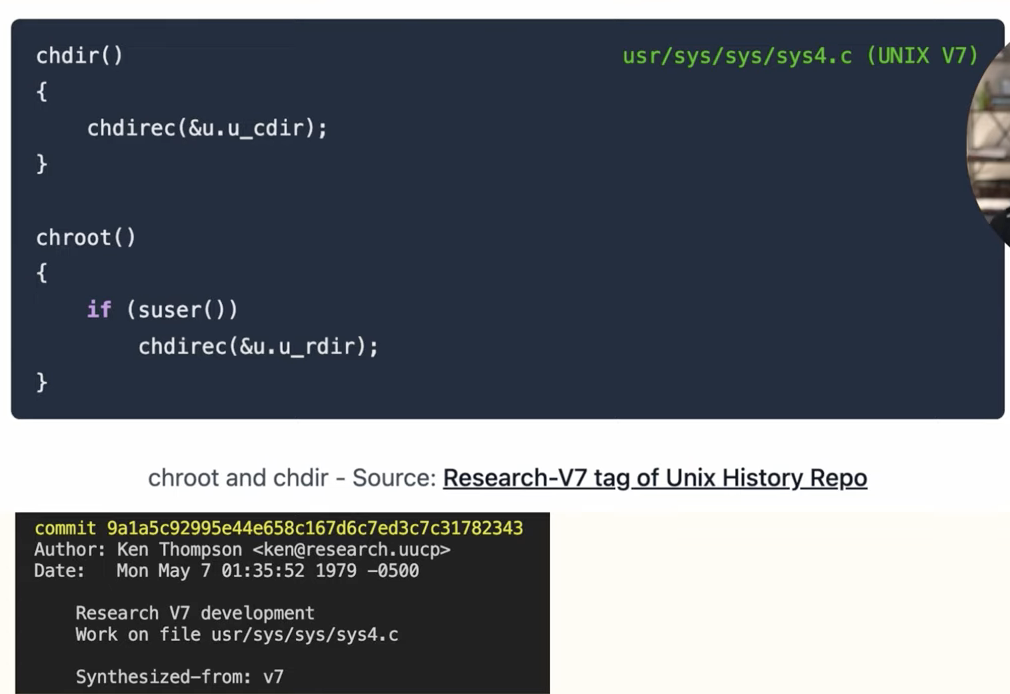
Lets escape the chroot
mount -t proc proc /proc
chroot /proc/1/cwd/ $SHELL
Or via nsenter (cf https://www.redhat.com/sysadmin/container-namespaces-nsenter )
nsenter -t 1 -m -u -n -p
So: while this looked like a container, it wasn't very contained at all.
https://www.youtube.com/watch?v=JOsWB50LmwQ
Ok, so there was this go program that did some stuff and in the end everything looked again like Linux? What's the big deal?
https://opensource.com/sites/default/files/1linuxtechs.png
Union filesystems
What we just saw in the above go code, is that a tarball of an entire linux-root-fs was copied into a location and thereafter extracted and a chroot was executed. In reality, that is very inefficient, so in order to allow for caching, reuse, sharing and tracking delta-differences: the real-life implementation of containers is not just one tar ball.
It's MANY tar-balls , in a tar-ball.
Overlay file systems
Means, we are mounting many layers into a single file system
Mount -t overlay
Lowerdir : read only , merge all layers (directoryies) into 1 fs
Upperdir : write to here ( usually empty to begin with)
Workdir: internal use
Target: merge the above in a single presentation view
The filesystem root for a container is (usually) isolated from other containers and host's root filesystem via the pivot_rootsyscall.
The container's root mount is often planted in a container-specialized filesystem, such as AUFS or OverlayFS. In case of OverlayFS, the container's root of / really lives in /var/lib/docker/overlay2.
Execute the following on your vm (you might wanna be root)
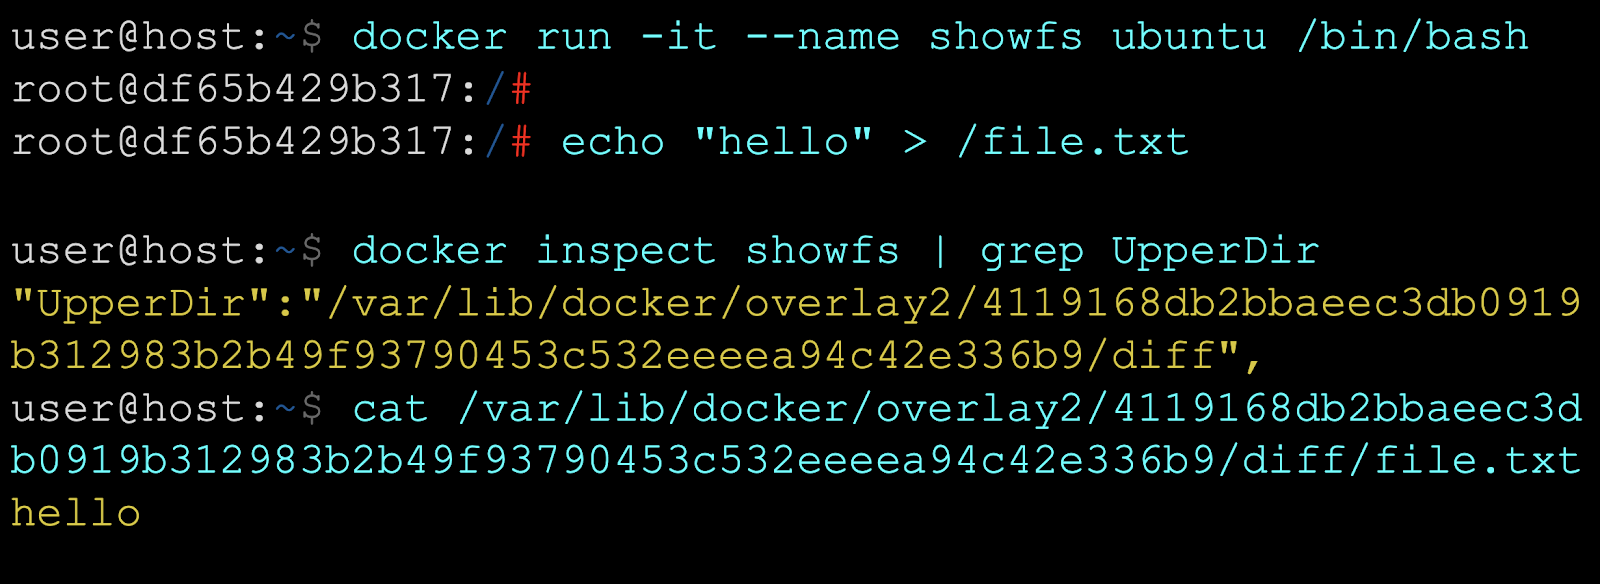
(Taken from https://0xn3va.gitbook.io/cheat-sheets/container/overview/basics )
Linux namespaces
Now, we'll explore the concept of containers a bit more in depth. The arguably most important concept are namespaces. (The little go program didnt use any so far)
A namespace is a way for the kernel to partition the resources a process can see
Let's do a shell one liner for the PID namespace (plus user and mnt):
As normal user
unshare -u -p --map-root-user --mount-proc --fork bash
So, now we are root and If you now ps -ef , you only see yourself ( 2 processes) , whereas that host you are running on clearly has more than these two processes. So we interactively (cause we forked our bash into it) executed an empty pid/mnt/user-container and now we can't see outside anymore.
So essentially a Linux container is a process that can only see its own stuff.
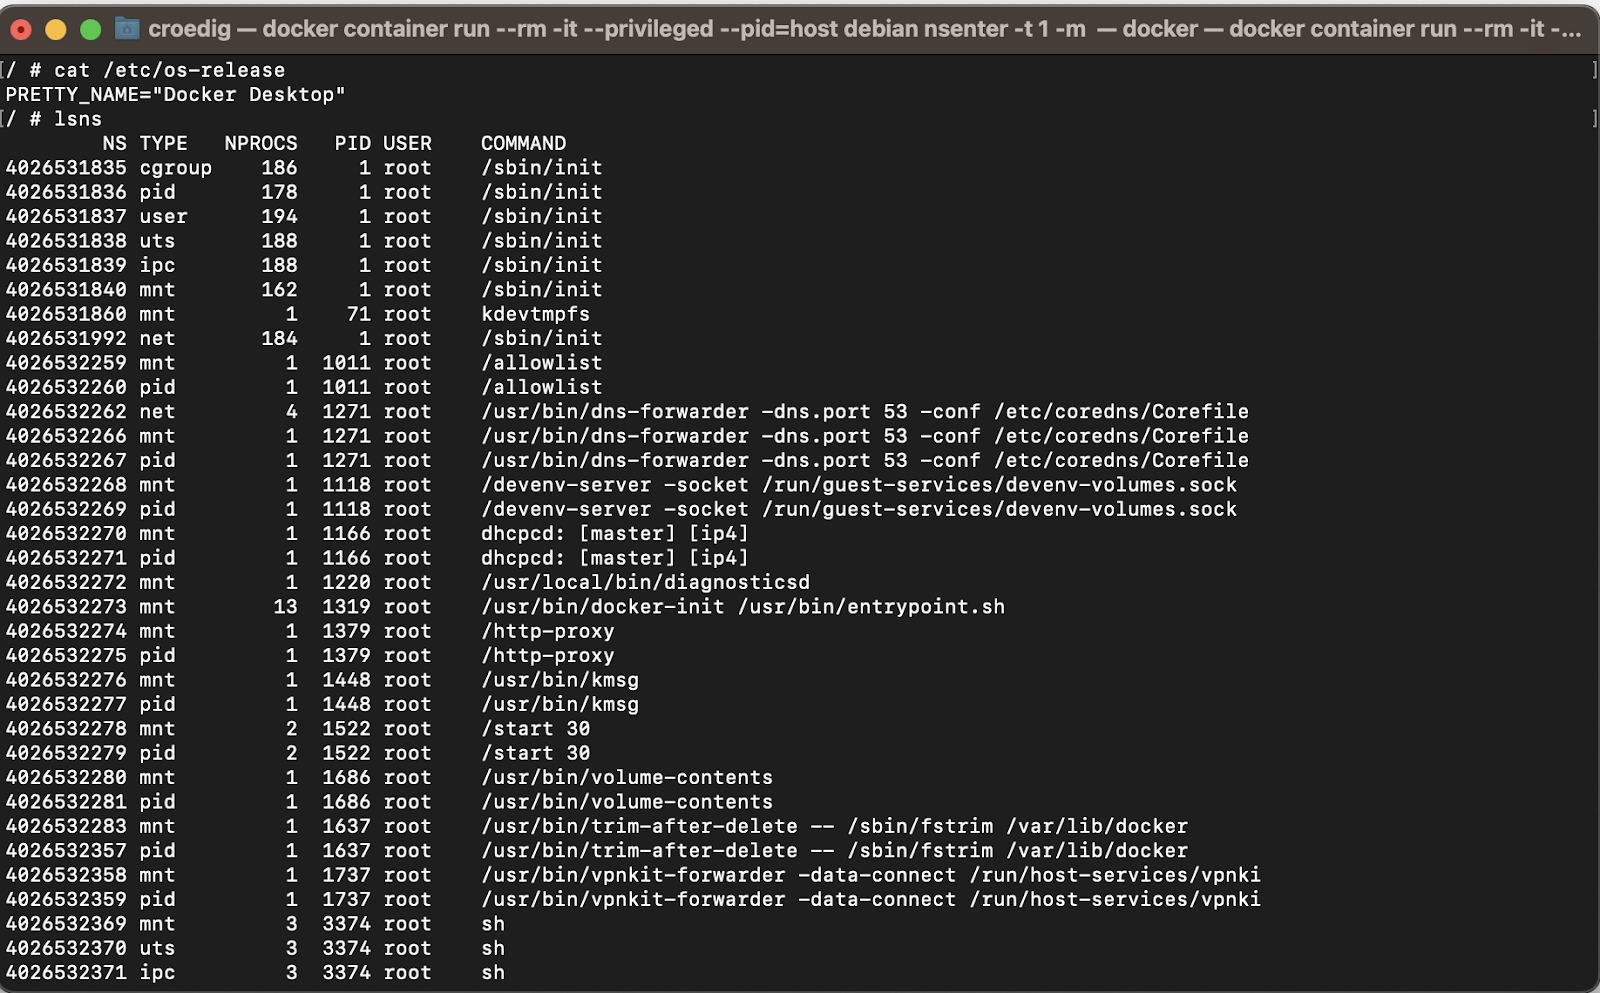
If you wish to list your current namespaces , lsns is your friend. If you run it as root, you will see all namespaces. If you are running your container as privileged (which amounts to almost the same) , you can use the switch —show-all
The following you may want to google or read up on the kernel docs, here is a list of the namespaces currently supported by Linux.
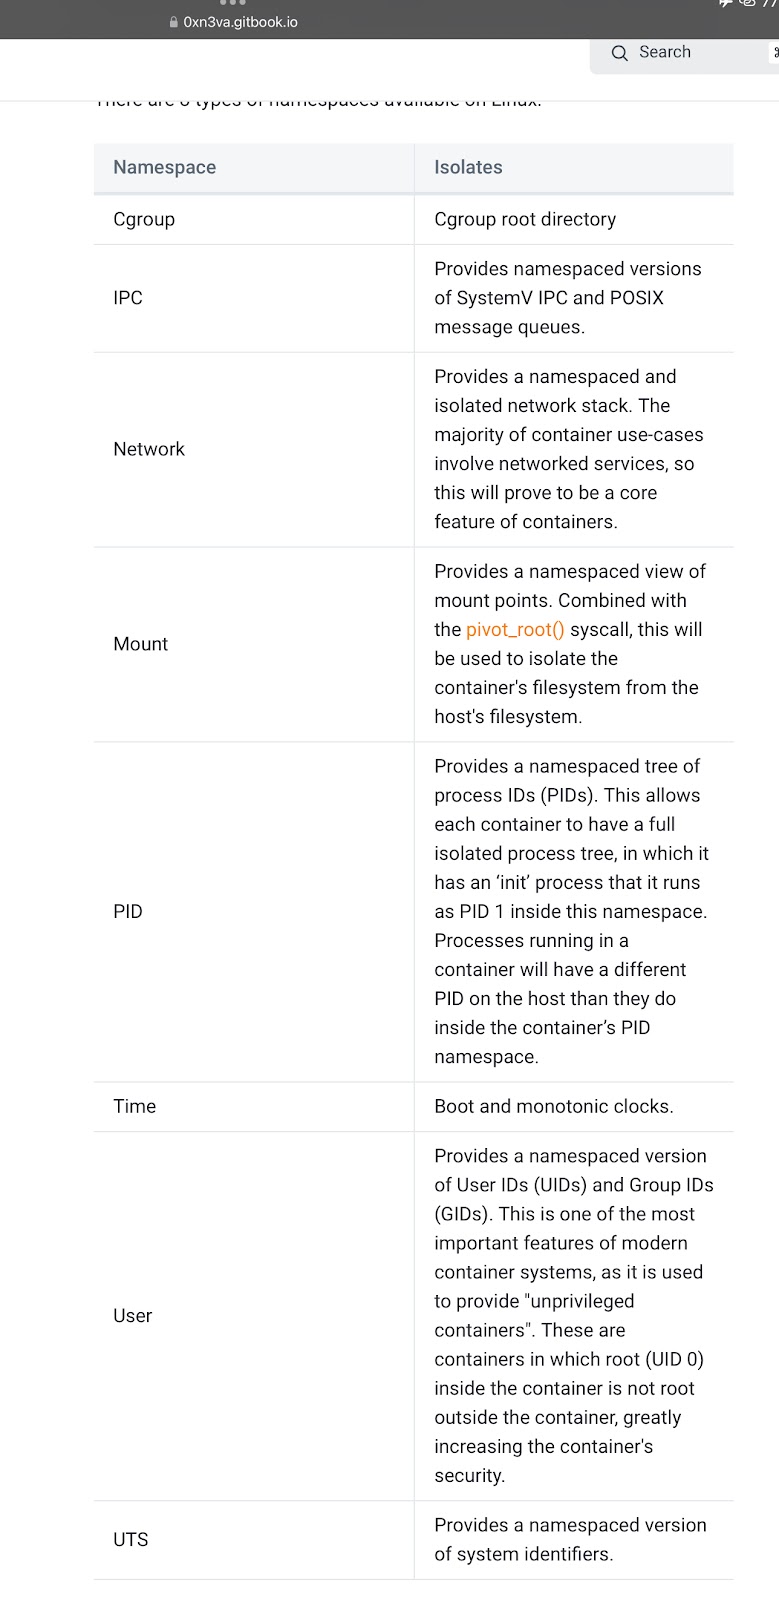
When a container runtime creates a new namespace (not the user namespace), it requires the Linux Capability CAP_SYS_ADMIN. Each process has one /proc/pid/ns/ subdirectory pre each namespace it (the process) uses.
Lets implement namespaces
Let's add some namespaces
Switch branch:
git checkout feature/ns
Make sure you have the alpine.tar.gz under your ./asset directory, don't delete it . We need it now.
Compile and run
go build chrun.go
sudo ./chrun run /bin/sh
Open a second shell and check with sudo lsns what changed now?
Run ps auxf inside and outside, that s different now
Nothing to see here
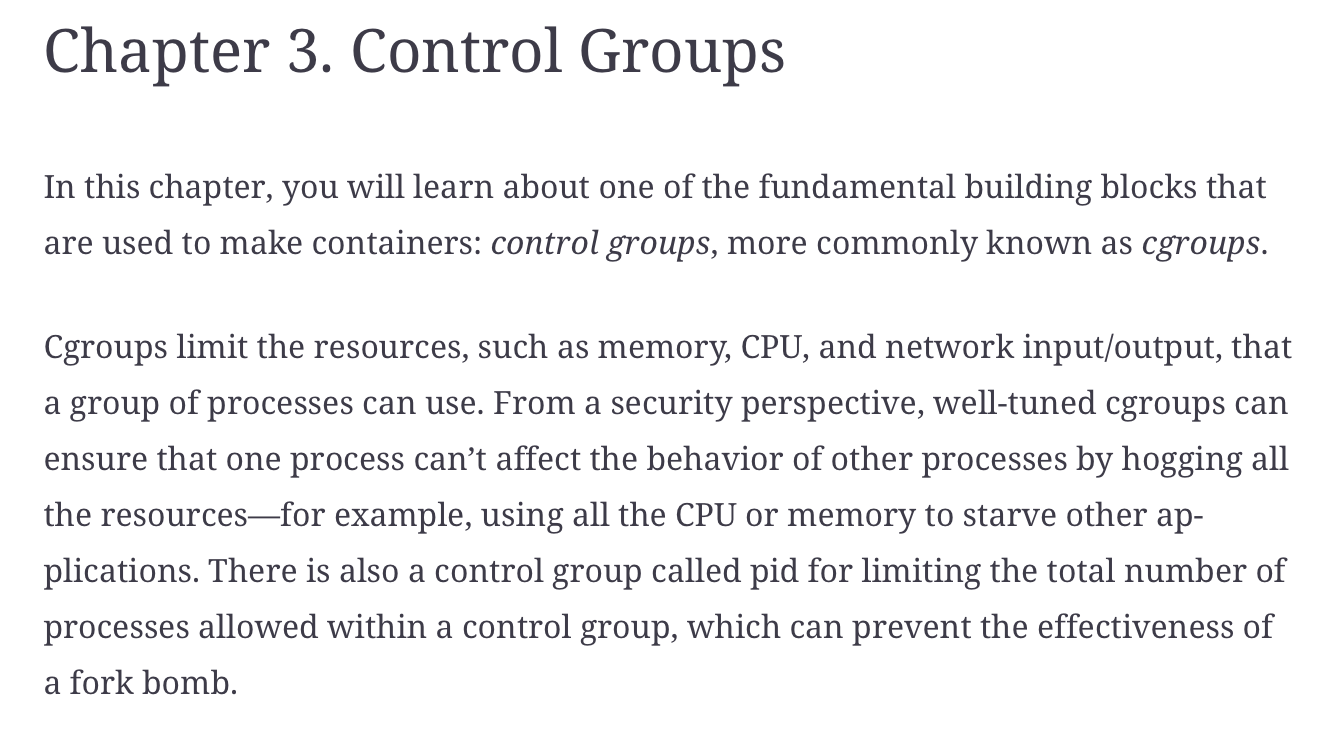
(From Liz Rice Container Security, chapter 3)
Back to our Go code
In your VM, investigate which cgroups there are:

[For a much cleaner version of the code here https://github.com/ntk148v/koker/blob/master/pkg/containers/container.go
Lets add some cgroups- association now to our "container", i.e. we are now not only creating new namespaces, but also adding a directory under the standard cgroup path called ‘hiii' , in which we then write the current PID and then we set the attribute pids.max.
git checkout feature/cg
go build chrun.go
sudo ./chrun run /bin/sh

We first notice, that the newly created cgroup was associated with our process.
You may check if it gets inherited (use ps auxf to follow the fork).
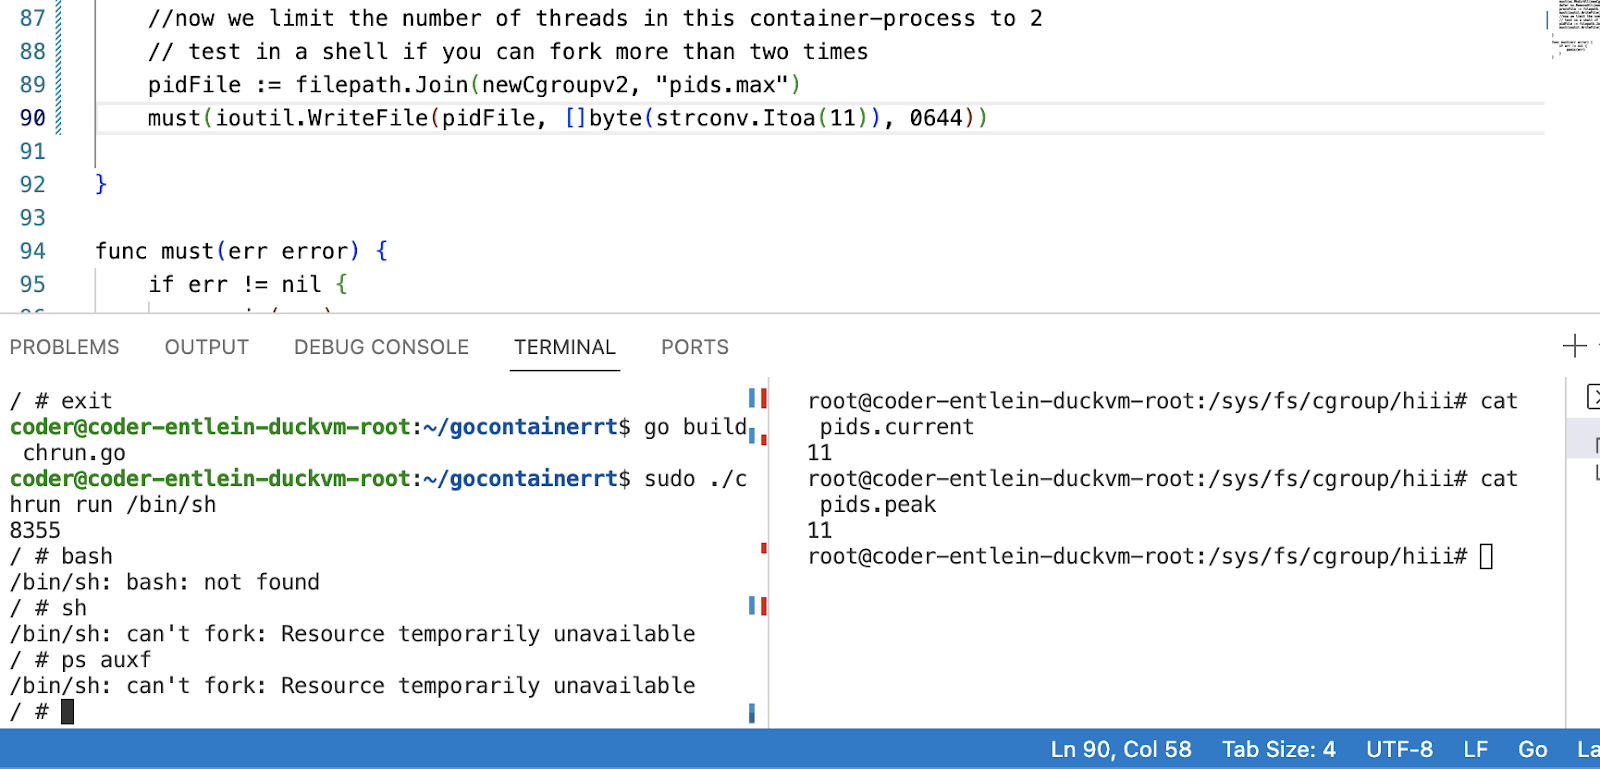
Feel free to play with setting different cgroups , just beware that you might totally crash the code and there will be orphaned cgroups floating around (not great if this is your real laptop).
Opportunity to contribute: if you find an easy way to defer delete the cgroups dir , please let me know or PR.
So we need to make it work
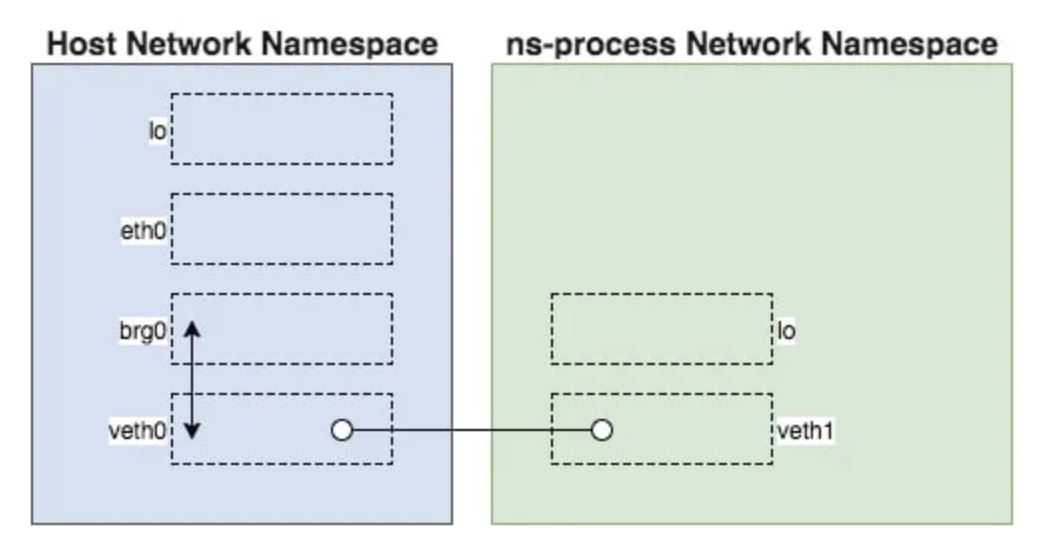
https://medium.com/@teddyking/namespaces-in-go-network-fdcf63e76100
Lastly Network
[ References:
https://forums.docker.com/t/adding-a-new-nic-to-a-docker-container-in-a-specific-order/19173/2
https://unix.stackexchange.com/questions/105403/how-to-list-namespaces-in-linux ]
git checkout feature/network
go build chrun.go
sudo ./chrun run /bin/sh
Get the pid from your "container" by using e.g. lsns

For me= 3129
Run the container and go root in a separate bash.
Sudo su -
Now we build a bridge (as root)
STOP HERE, DO NOT JUST COPY PASTE EXECUTE THIS, READ IT FIRST
#!/bin/bash
export pid=3129
mkdir -p /var/run/netns
ln -sf /proc/$pid/ns/net /var/run/netns/hi
ip link add veth1_container type veth peer name veth1_root
ifconfig veth1_container up
ifconfig veth1_root up
ip link set veth1_container netns hi
ip netns exec hi ifconfig veth1_container up
ip netns exec hi ip addr add 10.1.1.1/24 dev veth1_container
ip netns exec hi ip link set dev veth1_container up
Ok, in the container tab (left for me), first you should have only had a loopback, and no routing table (I mean: an empty routing table).
Now, after executing the above, you should see the new device being added, if not, check the pid, it is easy to pick the wrong one. Then you need to re-point the symbolic link and bring the veth devices (both) back up.

Just in case you need to get rid off the stuff again:
#!/bin/bash
export pid=3129
ip netns exec hi ifconfig veth1_container down
ip netns exec hi ip link delete veth1_container
ip link delete veth1_container netns hi
ifconfig veth1_root down
ifconfig veth1_container down
ip link delete veth1_container
rm /var/run/netns/hi


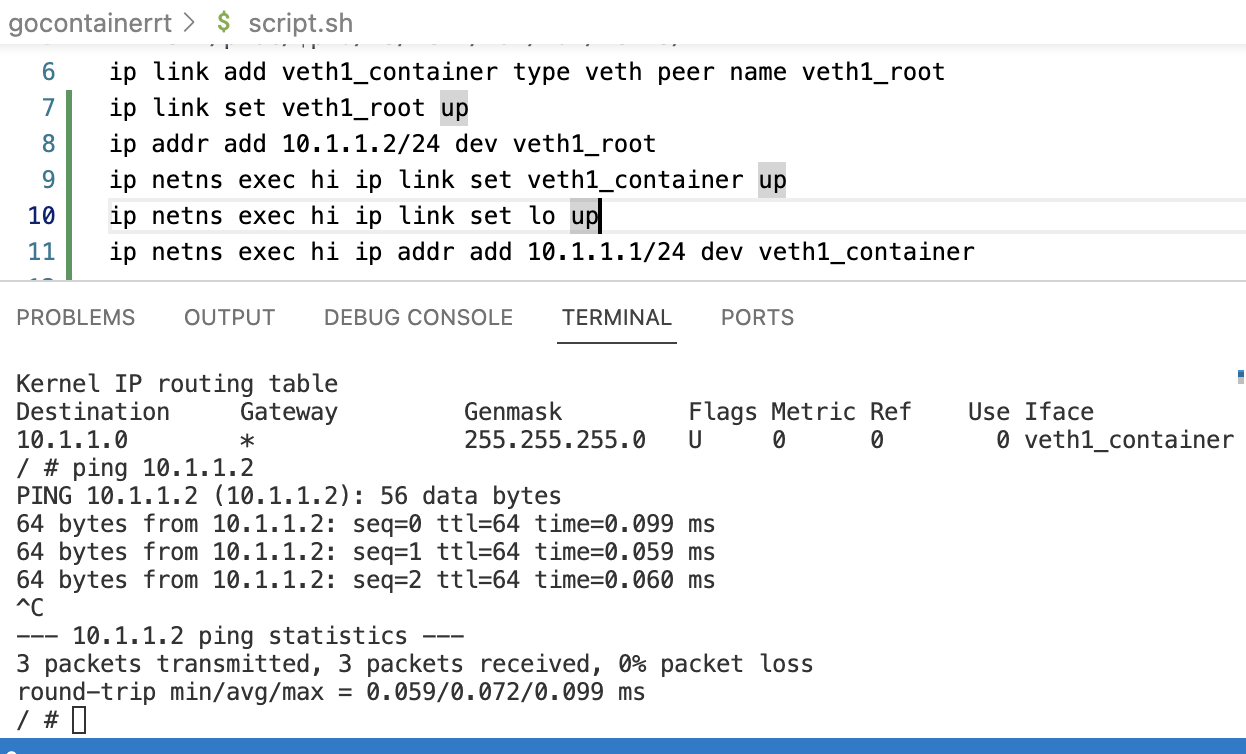
nsenter --net=/run/netns/hi bash
We are now pinging the veth1_root interface ( on the host) 10.1.1.2
From within the network namespace "hi" outgoing from veth1_container 10.1.1.1
And: also from the outside 10.1.1.2 towards the inside 10.1.1.1
We dont have a default gateway yet, lets correct this
ip netns exec hi ip route add default via 10.1.1.1
echo 1 > /proc/sys/net/ipv4/ip_forward
https://labs.iximiuz.com/tutorials/container-networking-from-scratch
https://stackunderflow.dev/p/network-namespaces-and-docker/
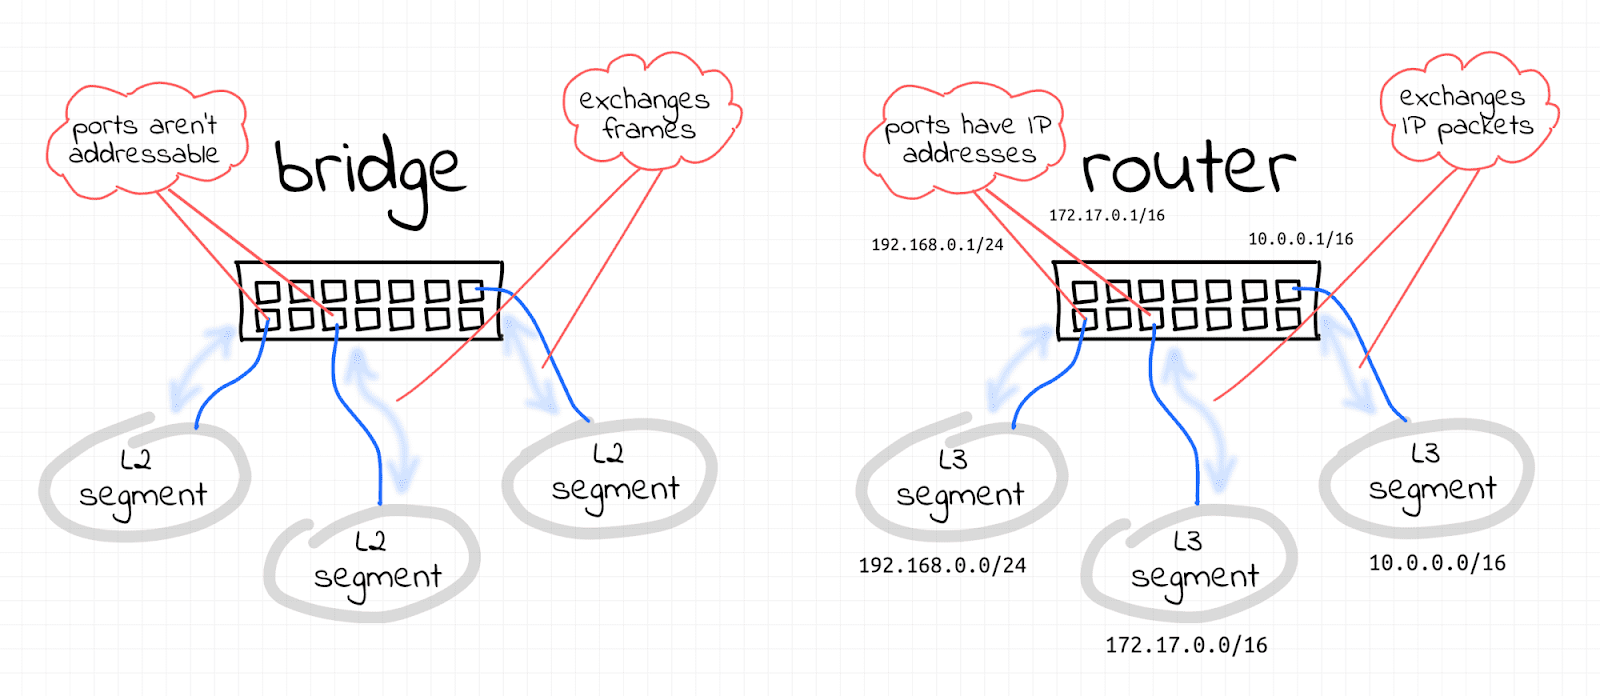
Image from Bridge vs. Switch: What I Learned From a Data Center Tour.
A brief pause to reflect
Let's go through the code, again
Exercise:
- Did the go-code use all kernel primitives that a container runtime should use?
- What specific syscalls are different ?
- What would you improve in the go-code?
SECCOMP
Seccomp basically stands for secure computing. It is a Linux feature used to restrict the set of system calls that an application is allowed to make. The default seccomp profile for Docker, for example, disables around 44 syscalls (over 300 are available).
The idea here is to provide containers access to only those resources which the container might need. For example, if you don't need the container to change the clock time on your host machine, you probably have no use for the clock_adjtime and clock_settime syscalls, and it makes sense to block them out. Similarly, you don't want the containers to change the kernel modules, so there is no need for them to make create_module, delete_module syscalls
https://opensource.com/article/21/8/container-linux-technology
Additonally, there are Linux Security Modules (LSM) such as SELinux and AppArmour. They have profiles for "typical container"- usage and are relatively static. They are on kernel-level and can additionally constrain processes, immensely.
For those interested: our homegrown kubernetes runs with SELinux/RKE2, if there is time, we can look at the setup in Lecture 6 or 7. Be aware that this can get rather time-intensive very quickly.
Lets see what projects are out there and how they differ
Navigating Container Landscapes
https://landscape.cncf.io/guide#runtime--container-runtime
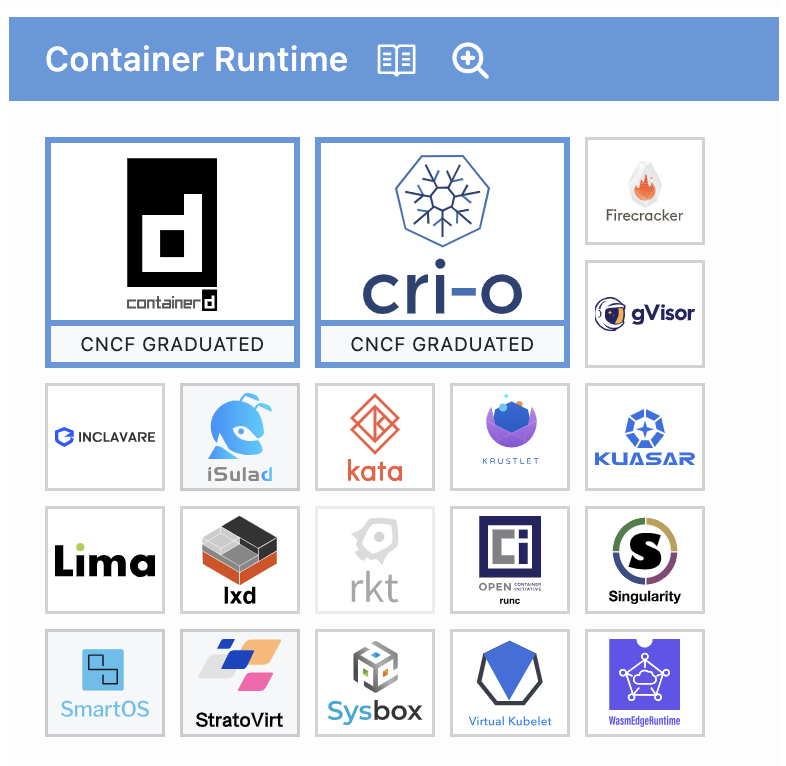
On your vm, find out the version of runc that you are using.
Recall the lectures (incl admission-ctf) until now: which of the above do you think you have used already?
On your daily Laptop: what is your current choice of high-level runtime and why?
During the week through March 22 2024
1 Run a simple pipeline exploit in Azure DevOps
In your own branch (!) , exfiltrate your secrets.
Setup something like ngrok and exfiltrate your environment variables. Write down your observations and reason about consequences wrt protecting pipeline execution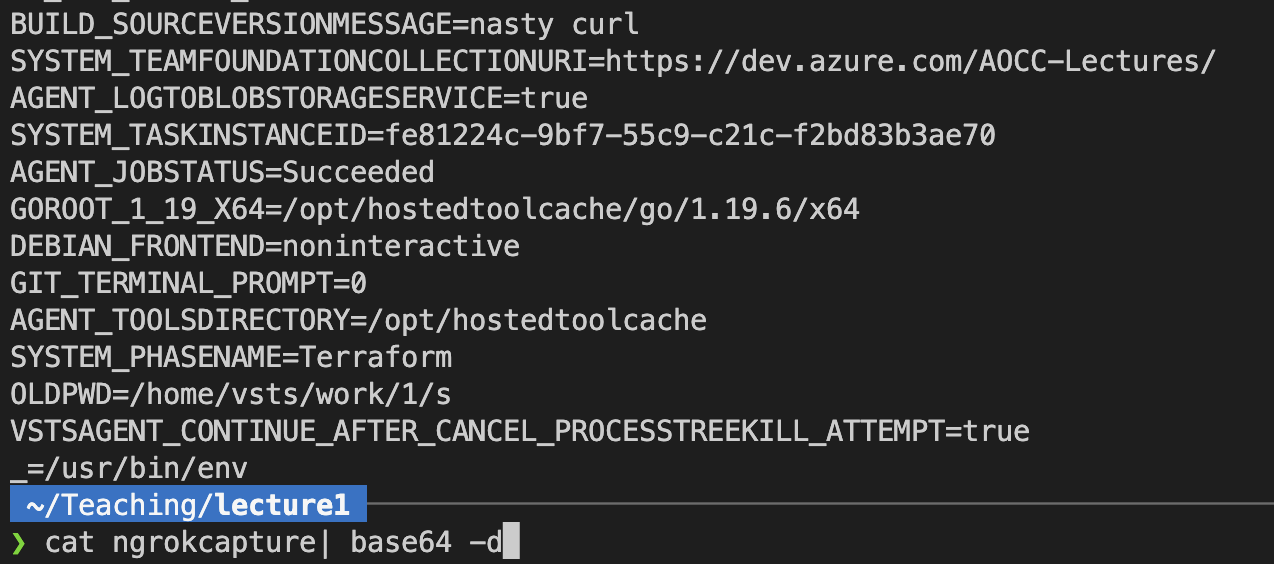
An example has been prepared for you here https://dev.azure.com/AOCC-Lectures/_git/HandsOnCloudNative?path=/templates/iac-student.yml&version=GBfeatures/ngrok&_a=contents
2 Org setup, charter on Github
Found your startup now (either on GitHub under the AOCC org or on AzureDevOps) , add your people, decide what documents you need
[e.g. look at https://github.com/ossf/wg-best-practices-os-developers/blob/main/CHARTER.md for inspiration , use something very light-weight]
For now, you need to decide if your repo is:
- public or private
- is it going to be OSS? maybe add a license
- basic branch structure : e.g. should people be allowed to push to main ?
- basic repo structure: what goes where, which top-level folder -> will folder names be used for anything later (e.g. in .ignore files) or will they not have meaning?
Goal
by end of week 3 (March 22) , you should minimally have:
- have 1 repo (private or public) under the AOCC GitHub organization , containing:
- License
- your Value Proposition (one per group) aligned in your group , possibly roles assigned
- a TL;DR in your Readme.md
AND a basic idea of what you are going to do
- a userexperience sketch (does your problem really solve a users issue - star-people-comic https://www.youtube.com/watch?app=desktop&v=zq00icc13I4 )
- Functionally: what technical components are you going to need, draft at least a highlevel architecture for your runtime.
- Plan how your team will achieve this until the final presentation (very roughly)
- Estimate how much this should maximally cost: how much budget will you ask for
IMPORTANT: do NOT draw a solution architecture but a functional architecture (Example:
Functional-architecture: "append-only database with exactly-once guarantee"
vs
Solution-architecture: "kafka-topic on Azure EventHub with replication factor 3 and retention-time 7 days")
3 Schedule a review meeting
Propose to your instructor several time-slots of 2 contiguous hrs via Zoom,
Give her all your materials at least 48 hrs prior, please.
Congratulations, you've successfully completed the container fundamentals lecture.
What's next?
- Make sure to schedule your Architecture-Review with your instructor to take place before April 7 2024
Further reading
- go to https://contained.af and play
- for mnt namespace tunnels, I found this article interesting (because I like tunnels) https://people.kernel.org/brauner/mounting-into-mount-namespaces . So: if you are so inclined, create an example usage of this, or demo to the class a summary "what is a mnt namespace tunnel?"